How’d Ya Get That Shot?
The pages of our magazine are stuffed to the gills with stellar examples of photography shot from a multitude of trusty touring saddles. We at Adventure Cyclist cheer aloud every time an author submits an incredible gallery to accompany their written story. The right photos bring a story to life beyond the words.
Visuals are processed 60,000 times faster than text — an MIT study found that the human brain only needs 13 milliseconds to identify an image. Literally: the blink of an eye. Because of this, photography is an important tool in print media storytelling. We aim to inspire our readers to dream of the vast expanse of Iceland with Greg Maino and to sit atop Ana Zamorano’s bicycle in Kyrgyzstan. These photographers do their job so well, they make us consider spending our next vacation days whisked off to a foreign land smelling new air and taking in new sights.
While smartphone cameras do the trick for Instagram, they don’t always cut it for print, which is obviously where we’re invested. Perhaps manufacturers aren’t too far away from smartphone cameras that will deliver the quality print demands, but we can always tell if a photo was taken with a smartphone. That’s not to say that the photos aren’t worth taking if you only have a smartphone, though — of course they are. But if you’re interested in gaining a bit of confidence carrying your prized DSLR into the backcountry to get the really good shots, we’re here to help.
Over the past year, Dan Stone and Ally Mabry tested over 30 pieces of camera-specific bikepacking bags, straps, and gizmos to find the crème de la crème — so you don’t have to.

Our Testers
Dan’s first camera was a Kodak 110 point-and-shoot camera that he received as a Christmas gift sometime in the mid-1990s (thanks, Aunt Julie!). He spent countless hours in his high school’s darkroom developing and printing black-and-white photos of abandoned Iowa farms and local punk and hardcore bands. He reluctantly traded film for digital over 10 years ago and has since come to embrace the medium for the creative control it offers. After completing a section of the Great Divide and local bikepacking routes in Idaho and Montana without a camera, Dan swore off smartphone photos for good and started experimenting with the best ways to carry a camera while cycling. It has paid dividends, and his photos have been awarded 10s of likes on social media. Dan currently shoots with a Fujifilm X-T3 and spends too much time pondering lens focal lengths.
Ally has been photographing her travels for the past decade, after first spending many nights leaning over chemical tubs in a haunted darkroom at the University of Alabama. Hailing from a family of artists in the Deep South, visual storytelling was baked into her metaphorical cake at birth. Ally’s first foray into bikepacking photography involved shooting 35mm film with a Minolta XG-1 on her first tour up the Oregon Outback in 2015, and soon after brought seven rolls of film down 1,400 miles of the Baja Divide. While she doesn’t consider herself to hold a candle to professionals (or to mega enthusiast Dan Stone), Ally has painstakingly sifted through and selected photos for the past 56 issues of Adventure Cyclist and has learned loads about photography vicariously. A year ago, she finally went digital with a Fujifilm X-T3 mirrorless camera because it is the perfect camera for bikepacking (in her completely unbiased opinion). Ally prefers dirt touring to road touring and, while by no means a gear snob, is heavily invested in protecting her new camera while she jostles it through the woods.
Straps

Straps are important. Which strap you choose is largely dependent on how you plan to use it — are you in the camp of keeping your camera on your handlebars and need a simple quick-draw method? A minimalist, lightweight shoulder or wrist strap might be the way to go. Are you planning to wear your camera on your back as you descend bumpy singletrack? A shoulder strap with a cross-body stabilizer is key. Your preferred method of photography will determine which type of strap you choose.

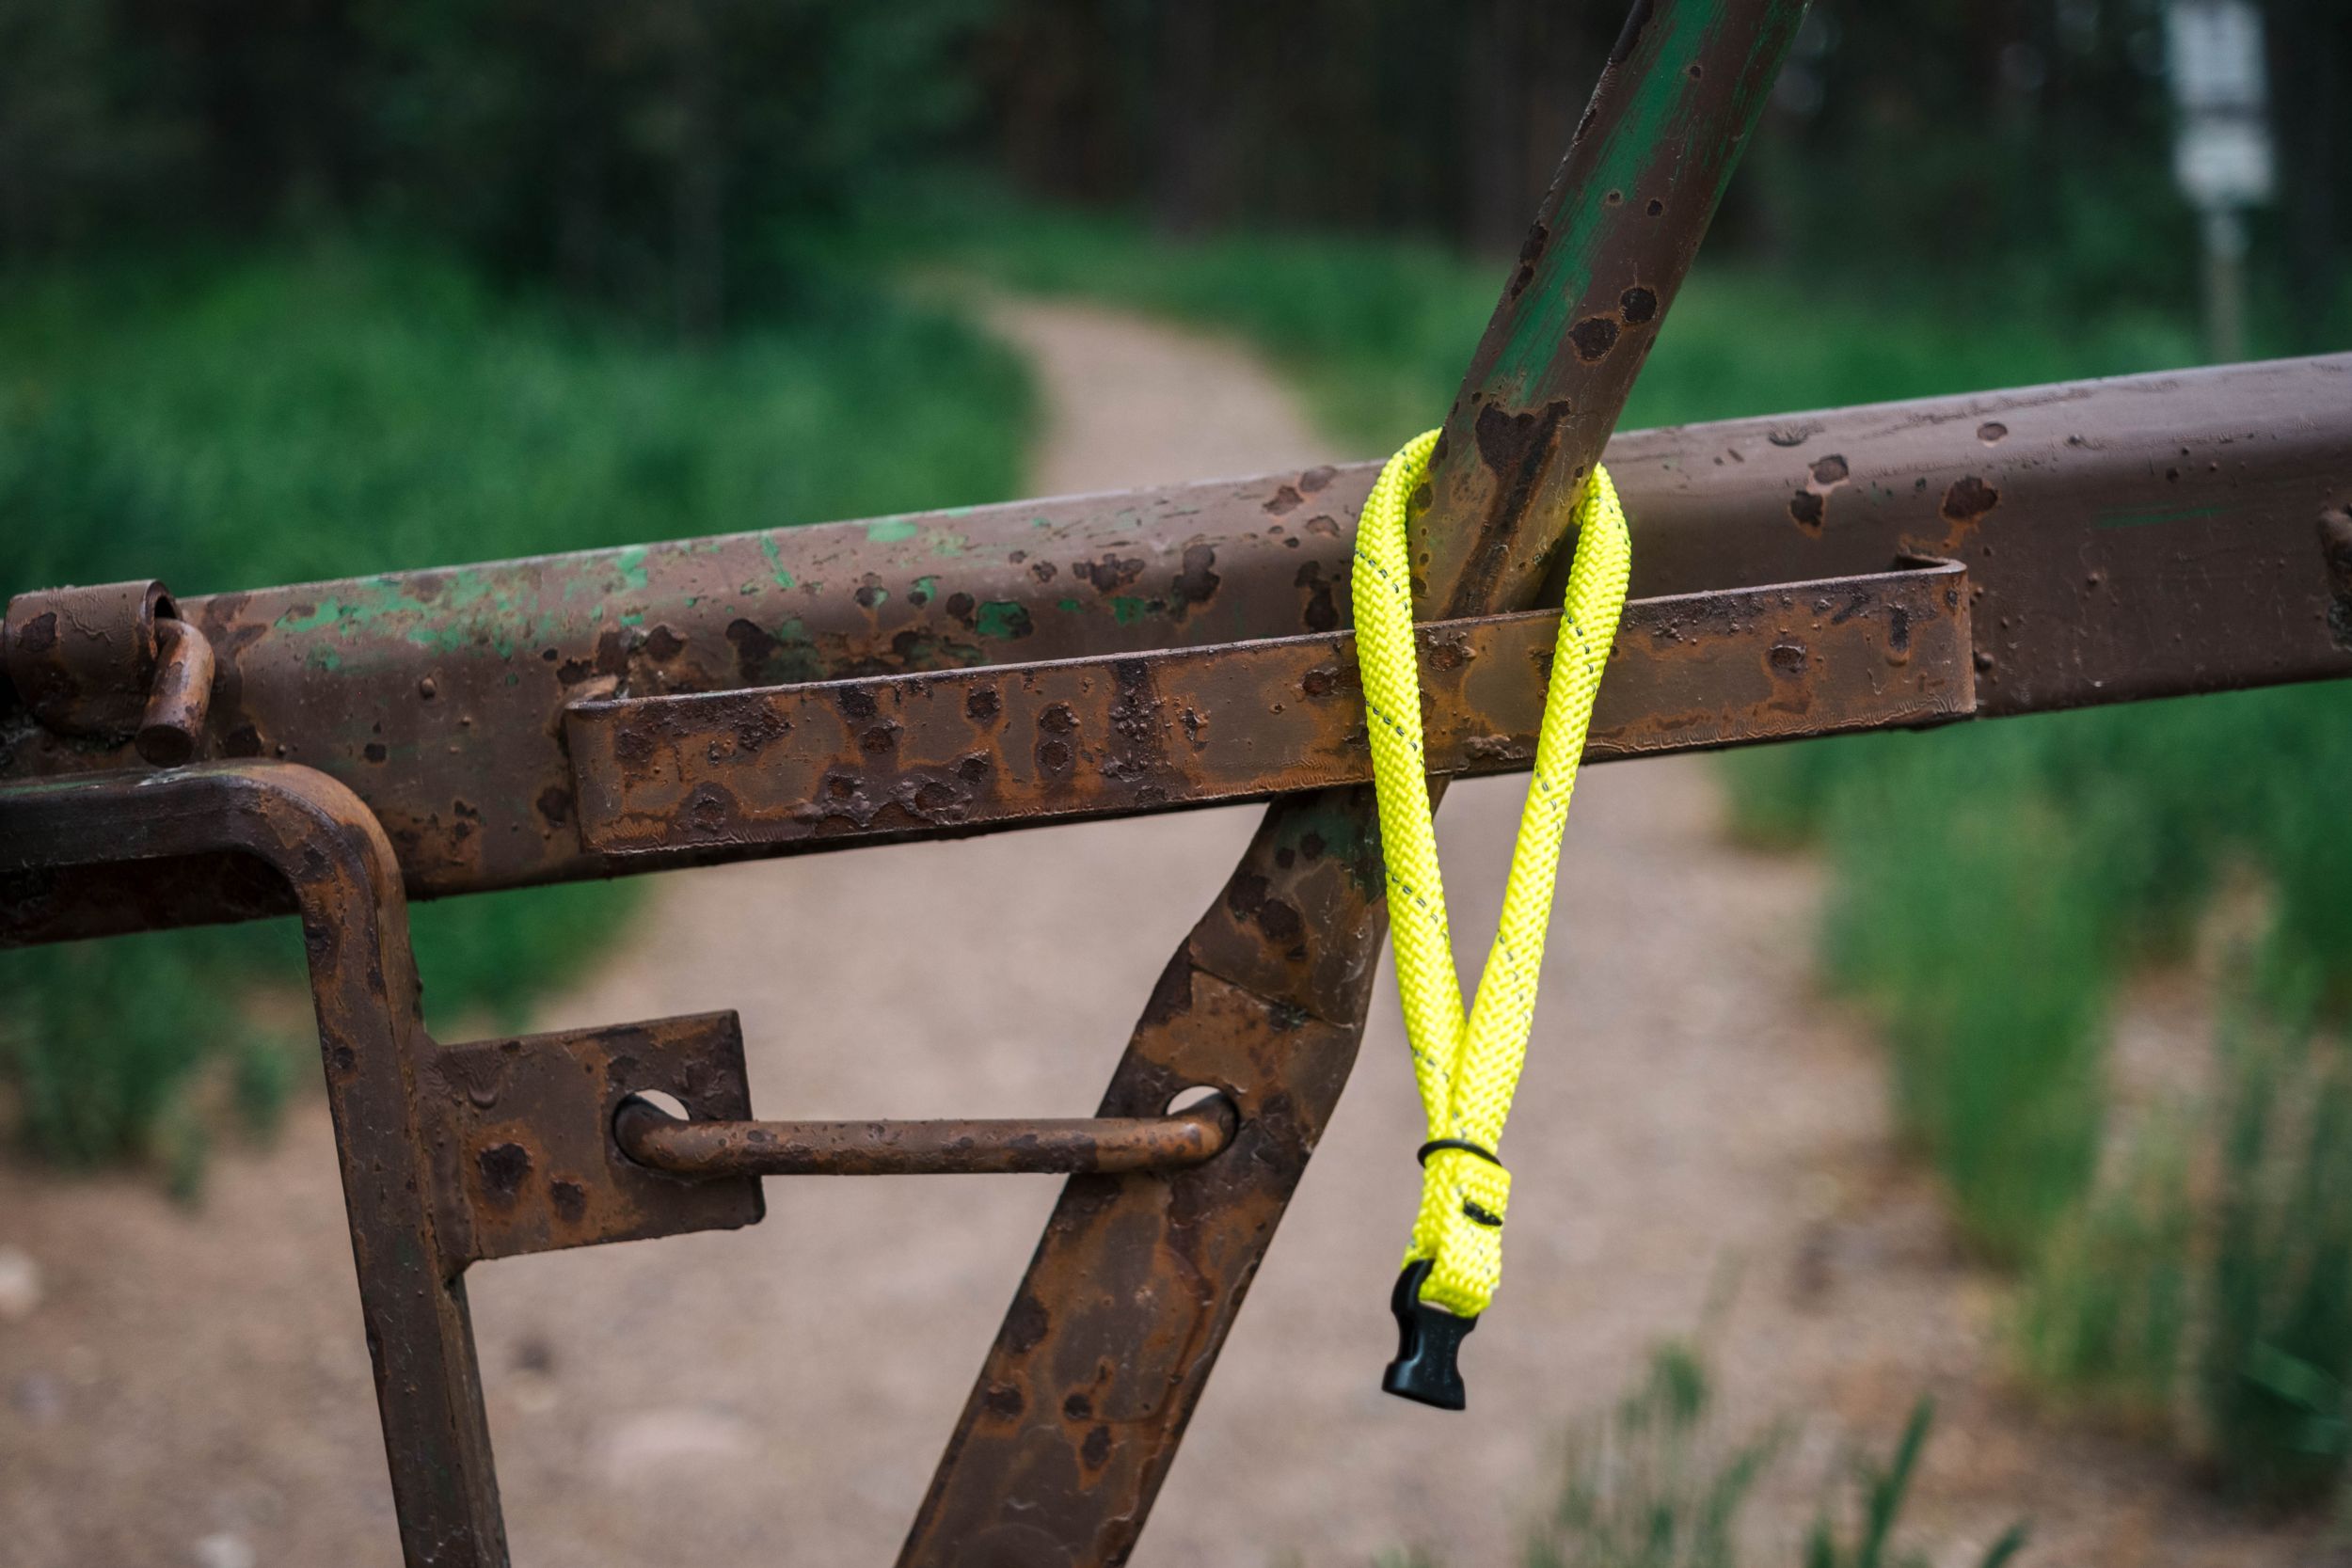
Outer Shell Rope Strap, $39 (Dan’s pick)
I’m a camera strap simpleton — if it takes more than .5 seconds to figure out how to use a strap, then it’s not for me. My brain is too busy obsessing over trivial details to be bothered with how to connect the whosit to the whatsit on some fancy newfangled strap. The Outer Shell Rope Strap gets the job done without overthinking it. I primarily ride with my camera in a handlebar bag or hip pack, so I appreciate the light weight and packability of this strap. For short periods of riding with a camera on my back, the Rope Strap’s one-handed length adjustment makes it easy to cinch up on the fly and keeps the camera from shifting around too much. I go back and forth between using a shoulder strap or a wrist strap, so I find quick-release connectors to be essential. While I tend to prefer the additional security of the Peak Design Anchor Links, the OP//TECH QD connectors pair well with this strap and have proven more than adequate in keeping my camera attached to my body. This strap’s diminutive size and 2.5-pound weight limit of the OP//TECH connectors means this strap pairs best with lighter, compact camera setups.

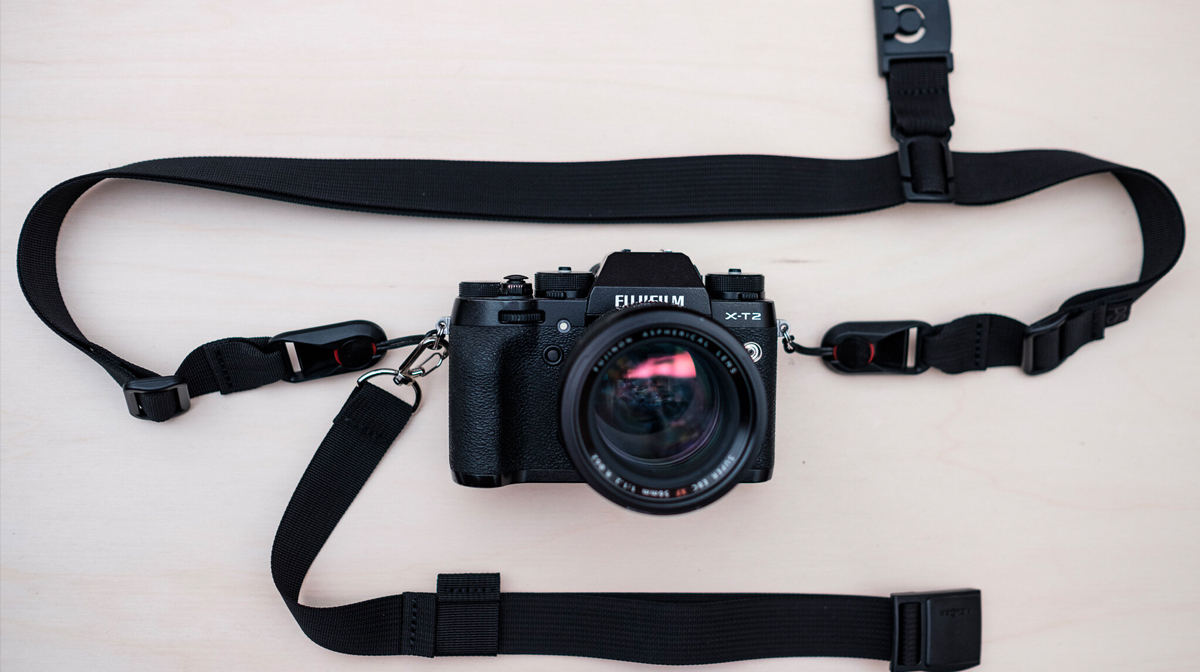
Outer Shell Camera Strap, $58 (Ally’s pick)
Unlike Dan Stone, I prefer to wear my camera most of the time I’m riding — in hot summer temps, it’s less preferable because the camera resting on my lower back prevents my sweat from evaporating and can fog up the viewfinder, but I find that the fewer the steps to get the camera to my eye, the more photos I will take. Because of my preferred camera carry solution, there are a few non-negotiable features a strap needs: comfortable padding/reinforcement where the strap sits on my shoulder, a simple profile with nothing that will dig into my back or neck, and a third attachment point in a cross-body stabilizer strap. The über-classy Outer Shell Camera Strap meets all these requirements and, of the 12 straps we tested, has won First Place Camera Strap in my book. The built-in cross-body stabilizer strap attaches to the strap mid-chest with a magnetic buckle that’s easy to unhook with one hand and attaches by screwing into the tripod mount. It keeps my camera from swinging forward and crashing into my top tube when I inevitably cycle downhill or go over large bumps. It’s adjustable from 26 to 42 inches via four different cinch points, and the cross-body stabilizer can be relocated along a daisy chain on the main strap. With all the adjustment points, I’m surprised at how sleek the system still feels. If you already have a strap that you love but want to add a cross-body stabilizer strap to it, check out the Stabilizer Strap by PS Bagworks.

BLACKRAPID RS-4 Classic Retro Camera Strap, $82
By far the most heavy-duty strap we tested, the BLACKRAPID RS-4 Classic Retro Camera Strap has a lot of interesting bells and whistles that make it quite different from the other straps on our chopping block. The strap itself consists of one-inch nylon webbing with two adjustment points: a quick-release leash (called the Front Rapid Adjuster) on the front, and a more standard adjustable cinch buckle on the back (also quite easy to adjust on the fly) — and that’s about where the commonly found features of a camera strap stop.
The RS-4 is technically more of a sling than a strap, as the three-inch shoulder pad stays in place no matter where you adjust the camera to sit. The pad is constructed of nylon honeycomb, foam, and mesh and has one small zipper pouch and one small pocket for extra memory cards, batteries, or other small gizmos. BLACKRAPID’s signature spring-loaded cam locks act as adjustable bumpers on either side of the camera attachment point — so you can effectively keep it from swinging the entire length of the strap when you’re not shooting. This is a really cool feature in theory, but I never quite got comfortable adjusting them quickly while riding. Maybe you’ll have better luck. The camera attaches to a small locking carabiner with additional security provided by the BLACKRAPID LockStar, a plastic guard that snaps onto the carabiner once it’s locked.
All in all, the features of this sling really impress me, but this wouldn’t be my first choice for an on-bike camera carry system unless I was only riding on pavement or planning to dismount my bicycle before taking a photo. I see it more as a strap to use when you’re shooting an event — having your camera ready at any moment when you’re walking around. I still think it’s worth mentioning in this guide, though, as it’s especially interesting for people who prefer to use straps that lack a third attachment point.
PS Bagworks Rope Wrist Strap, $16.50–$26.50
Simplicity is key with the Rope Wrist Strap by PS Bagworks. Made from half-inch flat braided polypropylene rope, this is the stiffest wrist strap we tested. Stiffness can be an asset if you plan to keep your camera in a front bag on your bike and need to be able to wield it quickly — the Rope Wrist Strap holds its shape, making it really easy to slip on and off your wrist with minimal hassle. The basic strap comes equipped with a five-eighths-inch stainless steel split ring, which is compatible with virtually any camera. Optional attachment upgrades include OP//TECH mini quick-release buckles for $2 extra, or Peak Design Anchor Links for $10. Straps come in small, medium, and large, and nine different colors.
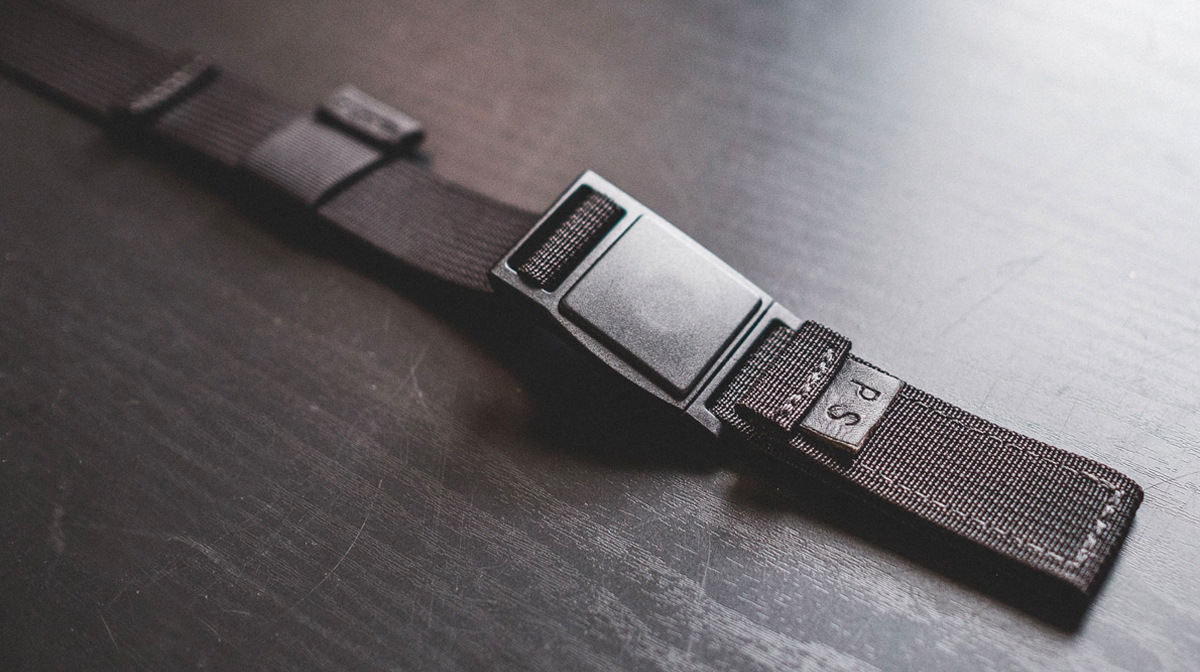
PS Bagworks Universal Camera Stabilizer, $35–$40
I absolutely love that PS Bagworks makes this product. For a lot of photographers who wear their camera while riding, a stabilizer strap is a make-or-break feature — in my case, I need one. Having the ability to add a stabilizer strap to virtually any camera strap in the world (maybe you already have one and don’t want to invest in a new setup yet, maybe you just really love the simple strap you already have) opens photographers up to so many mix-and-match combinations.
The Universal Camera Stabilizer attaches to your strap of choice with Velcro that folds over on itself to keep the stabilizer in place. The baseline model has another Velcro attachment for the bottom anchor kit: a spring-loaded carabiner that attaches to a metal anchor that screws into your tripod mount. For $5 extra, you can upgrade the Velcro anchor attachment for a permanently sewn-in Peak Design Anchor. Like other stabilizer straps on the market, there’s a FidLock magnetic buckle that is super easy to operate with one hand while riding. The whole strap is adjustable up to 18 inches. Though I prefer a softer webbing, the flexibility and adaptability the Universal Camera Stabilizer offers puts it at the top of my list.
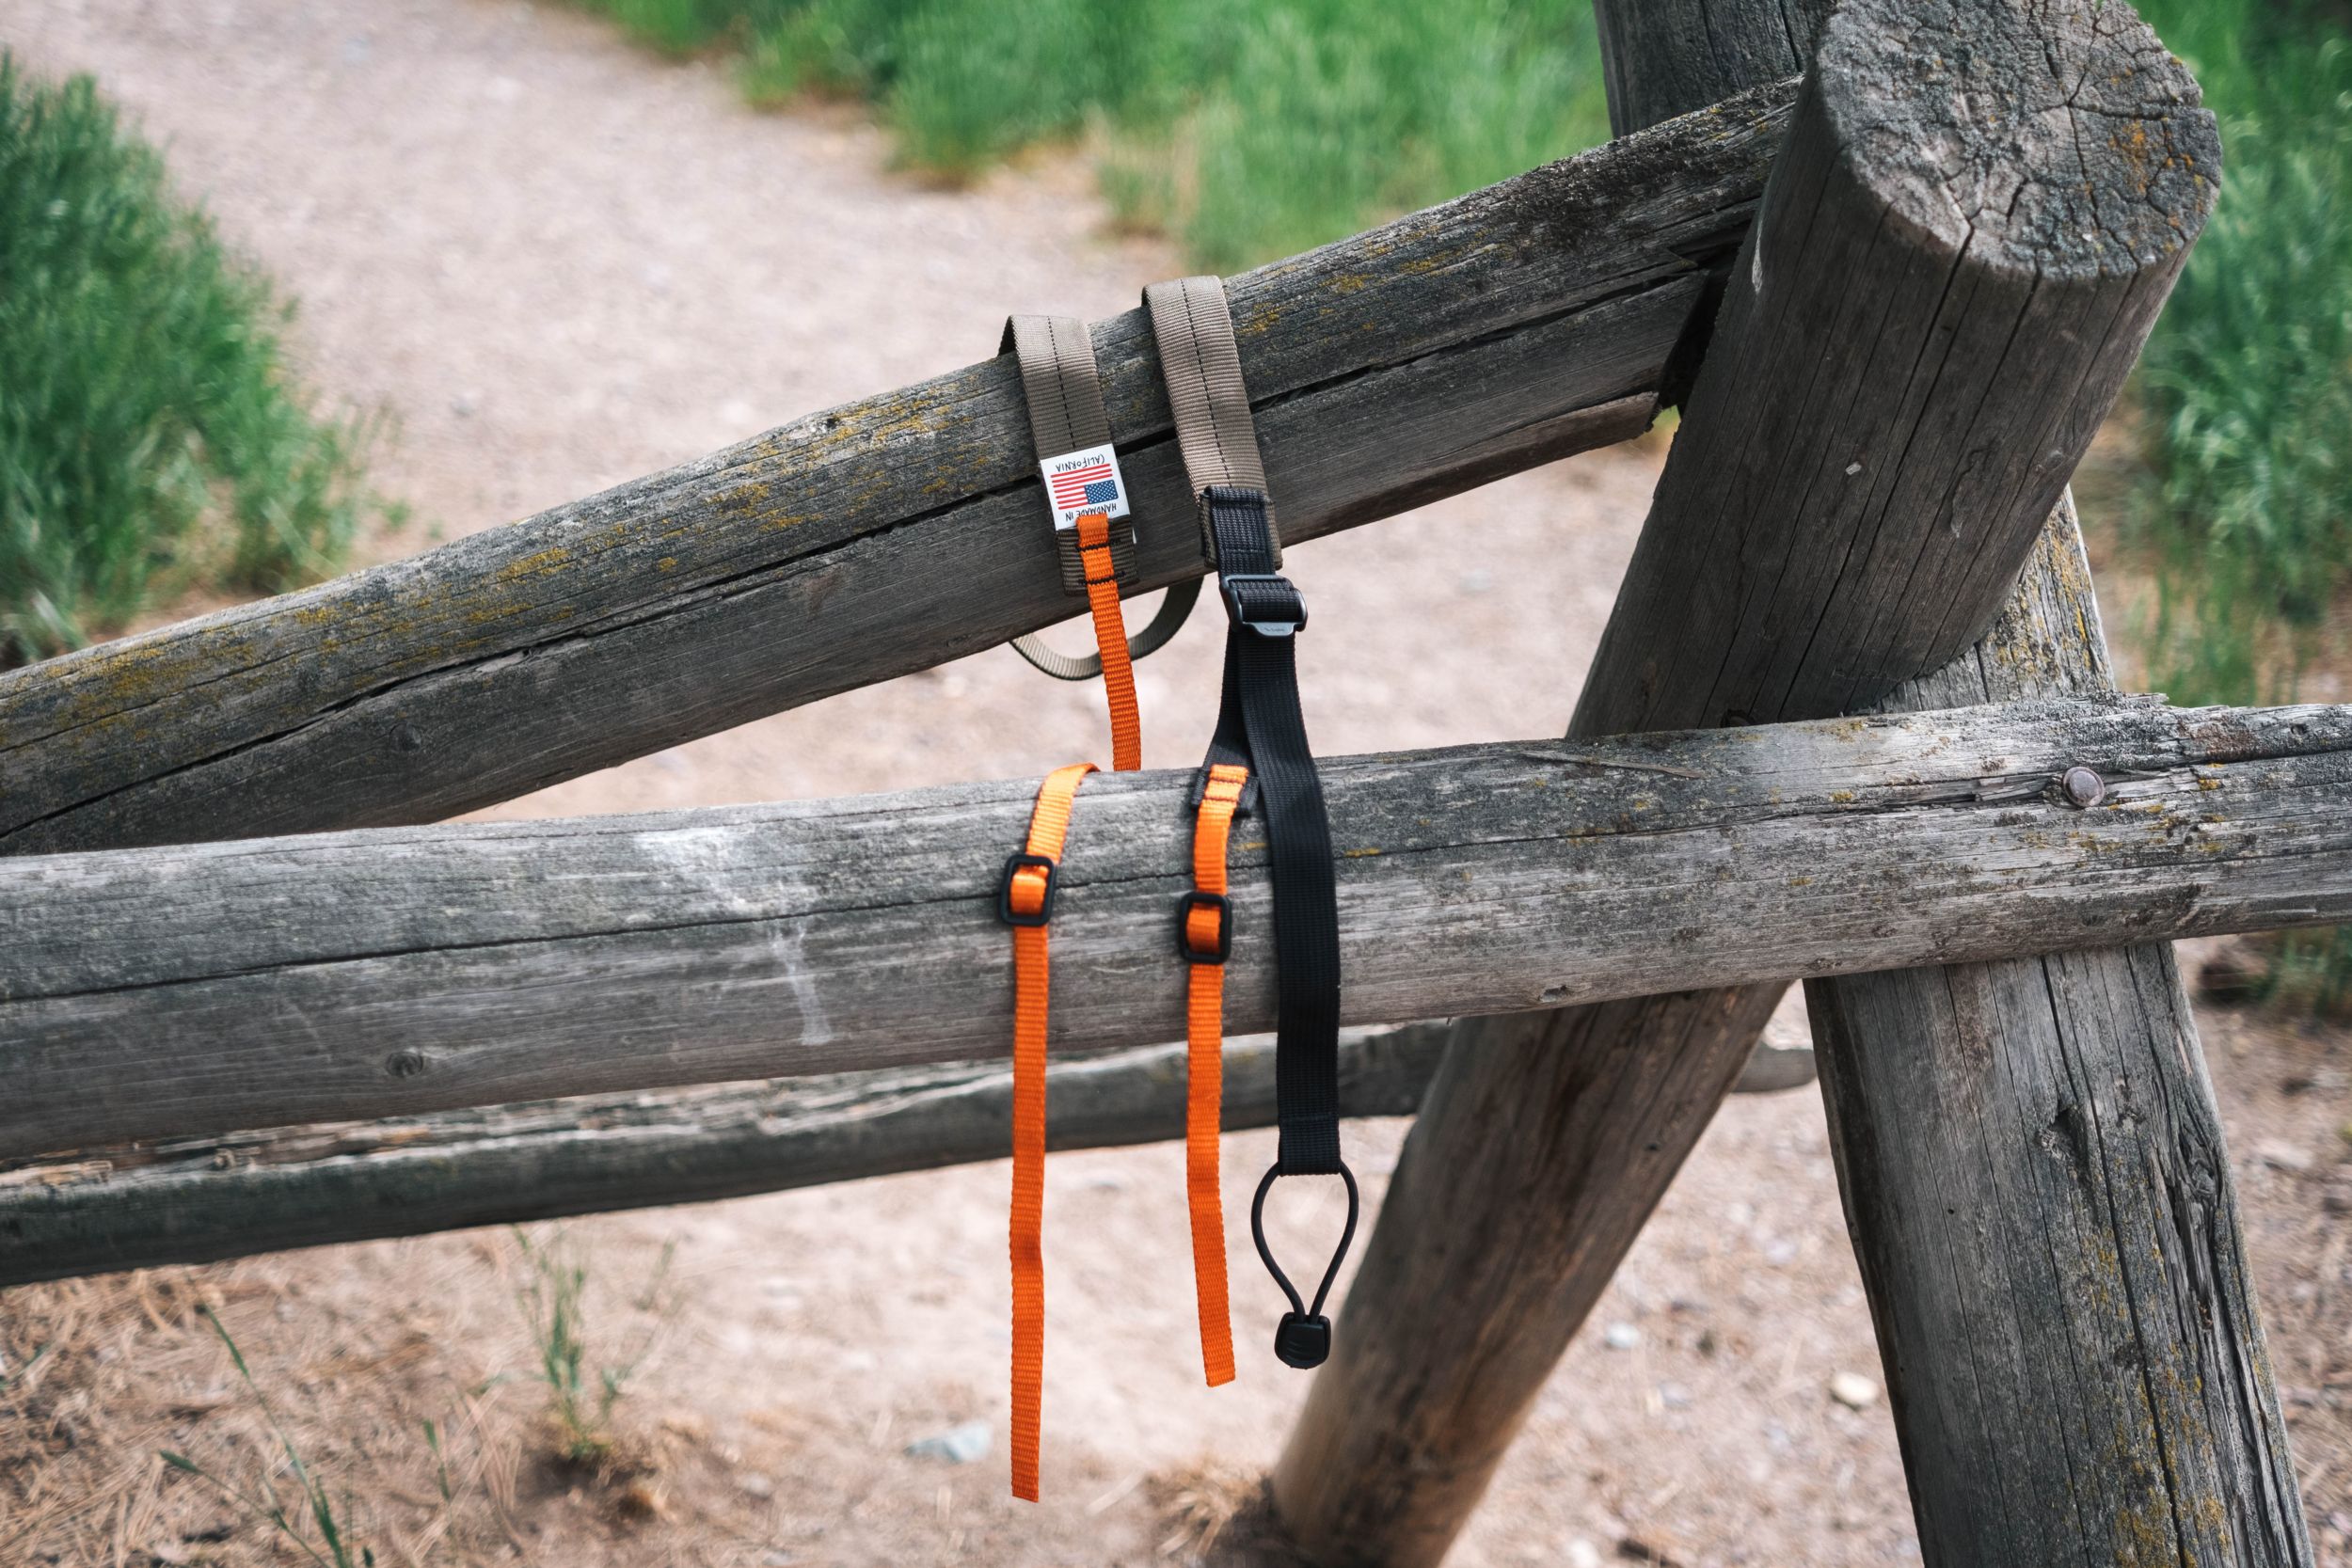
PS Bagworks Rider Strap, $55–$79
Designed with cycling in mind, the Rider Strap from PS Bagworks is made with one-inch, military-grade 17337 webbing, includes a removable stabilizer strap, upgradable attachment points, and can be adjusted to be between 36 and 48 inches in length. The stabilizer strap has a magnetic quick-release buckle and attaches to the camera with a mini carabiner that could easily be swapped out for any of the other quick attachment systems we’ve mentioned — it attaches to the main camera strap with a plastic adjuster buckle that has slits on both sides that allow removal from the strap. The option to convert this three-point attachment strap to a standard camera strap with two attachment points means this strap is one of the most versatile that we tested (PS Bagworks is good at versatile!). While I think this offers advantages over other straps in the way of adjustability, I found the doubled webbing to be too much strap around my chest. The webbing was a bit stiff and slightly abrasive, which wasn’t super comfortable when I wore a sleeveless shirt with this strap. Still, the construction of the Rider Strap is sturdy and is surely attractive to folks who like their gear to work in more than one mode.

Cedaero Light Meter Strap, $25
Made to be compatible with Cedaero’s Viewfinder Pack (more on that later), the Light Meter Strap is a slick option for a minimal shoulder strap. You choose between 1000D Cordura nylon or 15oz waxed canvas (my preference — it’s lovely) for the main body of the strap, which is lined with a soft 200D nylon. The rest of the strap is made with standard three-quarter-inch webbing and is adjustable from 32 to 51.5 inches via two cinch buckles. Though it comes with somewhat large, unwieldy plastic hooks to attach to the bag or your camera, it’s very easy to swap the hooks out for something else (like anchor links or other quick-attachment points). One-hundred percent made in the U.S., this strap is available in a lovely array of 15 colors of 1000D Cordura nylon and six colors of waxed canvas for $5 extra.
Essentially a miniature version of Outer Shell’s Rope Strap, the Wrist Strap is made with a soft, hollow rope that lies flat, helping it stay put on your wrist. The strap self-tightens with the weight of the camera, so if you were to accidentally drop the camera while shooting, it wouldn’t fall off your wrist. It comes equipped with quick-connect attachment points made by OP//TECH, which are optimal for cameras under 2.5 pounds. For heavier cameras, or for those who prefer Peak Design Anchor links, the end of the strap isn’t sewn to itself, making it super simple to swap attachment points. Handmade in California, this simple strap packs a lot of functionality into a minimal package.
As far as simple shoulder straps go, this one gets pretty high marks. The climbing-specific webbing is super soft — probably the softest webbing of 90 percent of the straps we tested (the Outer Shell Rope Strap comes close). It’s got an adjustable strap with a really generous, obvious loop that’s easy to find with one hand for quick tightening while riding. The strap attaches to your camera with webbing that doubles back through heavy-duty YKK plastic buckles. Although there isn’t a great way to attach quick connectors like Peak Design Anchor Links or OP//TECH mini quick release, it is quite simple to remove the strap from a camera and reattach it. Like the Jammer Bag and the Point ’N’ Shooter, the Road Runner Camera Strap is made by hand in the U.S. and comes in a variety of colors.

The Slide Lite from Peak Design is a sleek, stylish strap that pairs well with small and large camera systems alike. The Slide Lite comes with Peak Design’s Anchor Links, which are arguably the most secure strap-to-camera connector in the biz. I love that the connectors are sewn in so that there’s no chance of them slipping off the end of the strap, and the option for using the strap as a sling with the included tripod plate adapter is a nice touch too. The seatbelt-style nylon webbing is supple and comfortable for long periods of use but doesn’t pack down as well as some of the other straps we tested. At five feet, eight inches tall, I found the strap a touch long, but not excessively so.

The ultralight cousin of the Slide Light, Peak Design’s Leash utilizes slim aluminum/Hypalon sliders for one-finger adjustments. “Everything you need and nothing that you don’t” is Peak Design’s motto for this minimalist strap that can be quickly adjusted between 33 and 57 inches. The webbing is the same for the Leash as it is for the Slide Lite — supple and reminiscent of a seatbelt, so very comfortable and not abrasive when it rests on bare skin. Peak Design Anchor Links are included, making the Leash a very affordable two-point attachment shoulder strap.
Bags
Where you store your camera while you ride is purely personal preference, and there are generally three schools of thought: carry on your body, carry in a bag on your body, and carry in a bag on your bike. What terrain you travel most often will help direct which school of thought you’re in too. If you prefer to wear a backpack because it’s what you’re used to, any backpack that you’re comfortable riding with will work to hold a camera (just make sure it’s protected in there — see “Gizmos”).
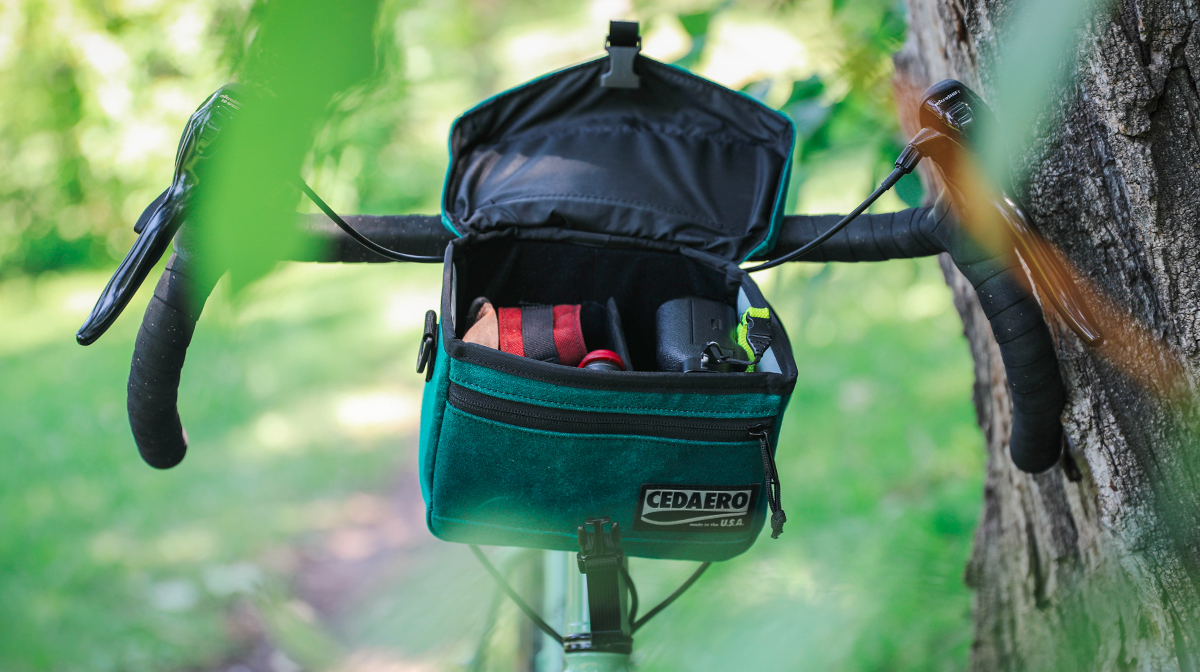
The Viewfinder Pack, appropriately named for camera carrying, is a sweet little sturdy camera case built to live on your handlebars or slung around your shoulder by attaching Cedaero’s Light Meter Strap to the D-rings on either side. The bag comes equipped with a removable and repositionable padded divider that Velcros onto the front and back of the bag’s interior — it’s super handy when separating your camera and your gizmos and for snugging up your valuables in this relatively rigid bag. There’s also a thin zip pocket on the front that works well for SD cards, a couple rolls of film, our Pocket Guide to Photography, or a Clif bar. The flip top has a rather narrow lip that hugs the sides of the bag when closed, but I wouldn’t trust it to keep out a heavy downpour or dust on a really windy day in the desert. The lid fastens with a quick-release buckle which is easy enough to open with one hand while riding. Closing the buckle with one hand while riding is possible when going uphill (read: slow) on pavement, but it does take concentration. The whole bag attaches to your handlebars with two Velcro straps and is stabilized by a third Velcro strap around your stem or headtube. Though the reinforced Velcro straps are sturdy, they’re kind of short (so that when they’re folded down in over-the-shoulder camera bag mode, they line up flush with the bottom of the bag). After a low-speed crash, one of the straps attached to my handlebars came undone under the impact.
While I love the look of this bag on and off the bike, I found that it was easy to jostle the heck out of my camera when I ventured off-road if I didn’t wedge it into the bag well enough with the padded divider. A good solution is to add some extra padding to fill the space between the lid and the camera, like a Domke wrap. This is a rather typical side effect of a more rigid handlebar bag when carrying a camera. If you’re sticking to pavement, this would be a lovely way to carry your camera and accessories. Every piece of the Viewfinder Pack is made in the U.S. Choose between light weight 1000D Cordura in 17 colors or upgrade to robust waxed canvas (shown here) with seven color options for $10 extra.
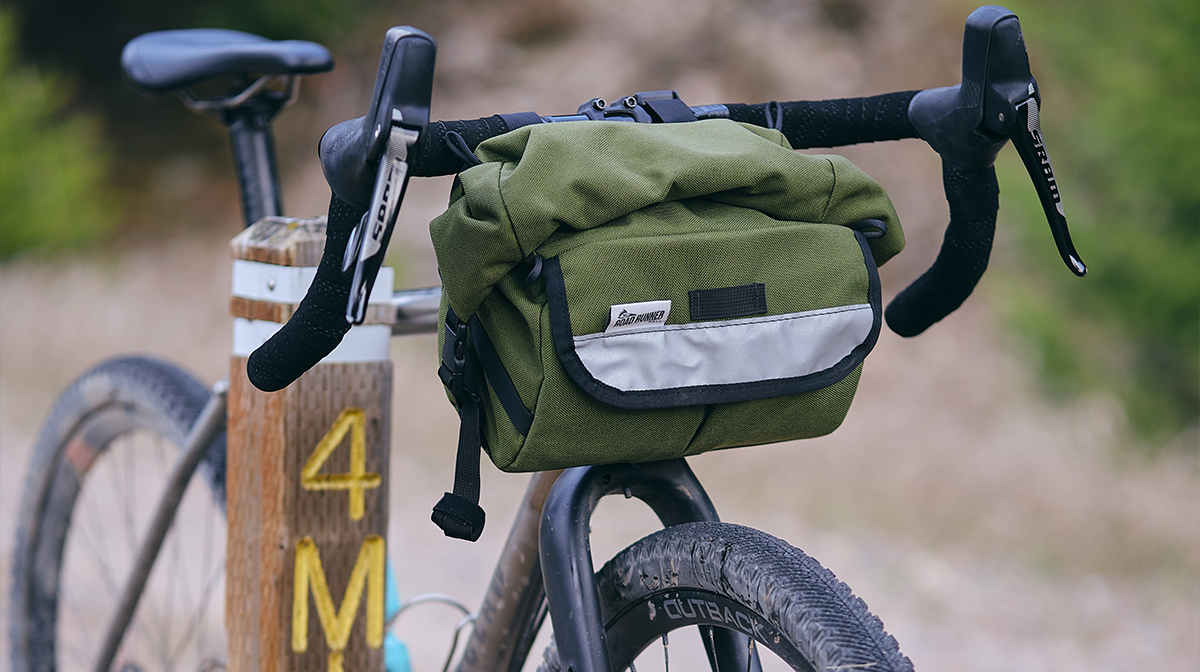
Road Runner Jammer Handlebar Bag, $170
Handmade with love in Los Angeles, the Jammer is a rando-inspired rolltop bag with an 11-liter max capacity — that’s enough space to fit your camera, an extra lens or two, a few gizmos, and a long-sleeve layer for when golden hour turns to blue hour. The two cinch straps on either side help tighten things down to a svelte six (-ish) liters for when your cargo is minimal. Though I only tested it as a handlebar bag, it’s designed to also be mounted as a rear bag for when you’re sticking to pavement. It can also be mounted to a front or rear rack. Rolltops are great for water-resistant security and relatively quick access. Aside from the two expanding front pockets, there isn’t much to organization in this bag: it’s essentially a small, cavernous pouch. Don’t be the fool who puts their DSLR in the Jammer with a Leatherman and also a Gu packet — that’s just asking for it. We did find that with the provided straps, this bag shifts from right to left a lot along handlebars when navigating tough terrain. For that reason, we recommend using a rubber ski strap or similar strap that is guaranteed to stay put.

Swift Industries Catalyst Pack, $160
The Catalyst is a mid-sized pack from Swift Industries that, like the Road Runner Jammer, can be mounted on a handlebar or saddle; I tested it as a handlebar bag and found it to be a very capable photo gear hauler. At 7.5 liters, the Catalyst fit my padded camera insert perfectly, and allowed me to bring an extra lens or two for photo-centric bike missions. The lid of the bag fastens via two adjustable buckles, and the interior features a drawstring closure and compression strap that are useful for cinching down bigger loads. A small zippered pocket on the top of the bag can be used to store keys, cash, and other miscellanea. I underbiked some bumpy singletrack with the Catalyst fully loaded, and it was surprisingly well behaved, thanks in large part to the Voile Nano Strap connectors and a removable plastic liner that helps to stabilize loads. The Catalyst is made from recycled 400D ECOPAK, which makes it lightweight, durable, and environmentally friendly. Plus, the teal version looks pretty sharp.

Rockgeist Nigel handlebar bag, $120 (Dan’s pick)
This handlebar bag checks all the boxes for me. It’s lightweight, minimalist, waterproof, and made in the U.S. and Canada. The rolltop design and single elastic closure is brilliantly simple and allows for quick, one-handed access to camera equipment while riding. A foam bed liner helps protect photo equipment, and additional protection can be added via a small camera insert, a camera wrap, or a puffy jacket. I’m convinced that Voile Nano Straps are the pinnacle of bag-to-bar attachment systems and am psyched that Rockgeist went this route with the Nigel. At 4.25 liters, this is on the smaller end of the handlebar bag spectrum, but I find it works well for carrying a small mirrorless camera, a few snacks, and a lightweight windbreaker — all without limiting hand placement on the bar tops. Those looking for more space would be well served by something like the 6.5-liter Swift Industries Catalyst, which also earned high praises in our tests.

Route Werks Handlebar Bag, $189 (Ally’s pick)
Even though I’m “not a gear snob,” I’d like to steer you to consider investing in this kind of pricey, heavily engineered, insanely sturdy — like, bomb proof — handlebar system, with the caveat that it’s not a great solution for giant camera bodies paired with giant lenses (or suspension forks, as it’s designed for rigid). I don’t know the people at Route Werks, but I’d reckon they’re a bunch of Swiss engineers based on how precise, modular, and fancy the Handlebar Bag is.
The bag itself attaches to the Bike Mount with a sturdy (adjustable) on/off clamp lever. Most notably, the lid of the bag is plastic, which I didn’t expect to love as much as I do. This bag made me realize how much internal agonizing I do when it?s time to undo the rolltop or the many buckles of a handlebar bag to get my camera out (except for the Rockgeist Nigel bag, which I adore.) With this bag, you simply push a small latch that pops the lid free from the body. The lid hinges on the far side of the bag, which means it opens toward you, allowing quick access to your camera. The Handlebar Bag has small interior and exterior pockets that fit keys, smartphone, and a multitool. I’d recommend a Domke Wrap on top to make sure your camera is nice and snug in the compartment because once it is, there’s no chance it will jostle in this bag.
Because it?s modular, you’ll need to do a little homework before ordering. To make the bag one with your handlebars, Route Werks includes a proprietary Bike Mount (if your bars are 31.8mm, carry on. If they’re 26.0mm or 25.4mm, add the Bike Mount Adapters, which are sold separately.) To mount a cycling computer or your phone to the lid of the bag, add the BarFly Tech Adapter or Quad Lock (respectively). Add the Handlebar Stub to attach a front light or a bell to the side of the bag so your light beam is unobstructed and to save handlebar real estate for your hands.
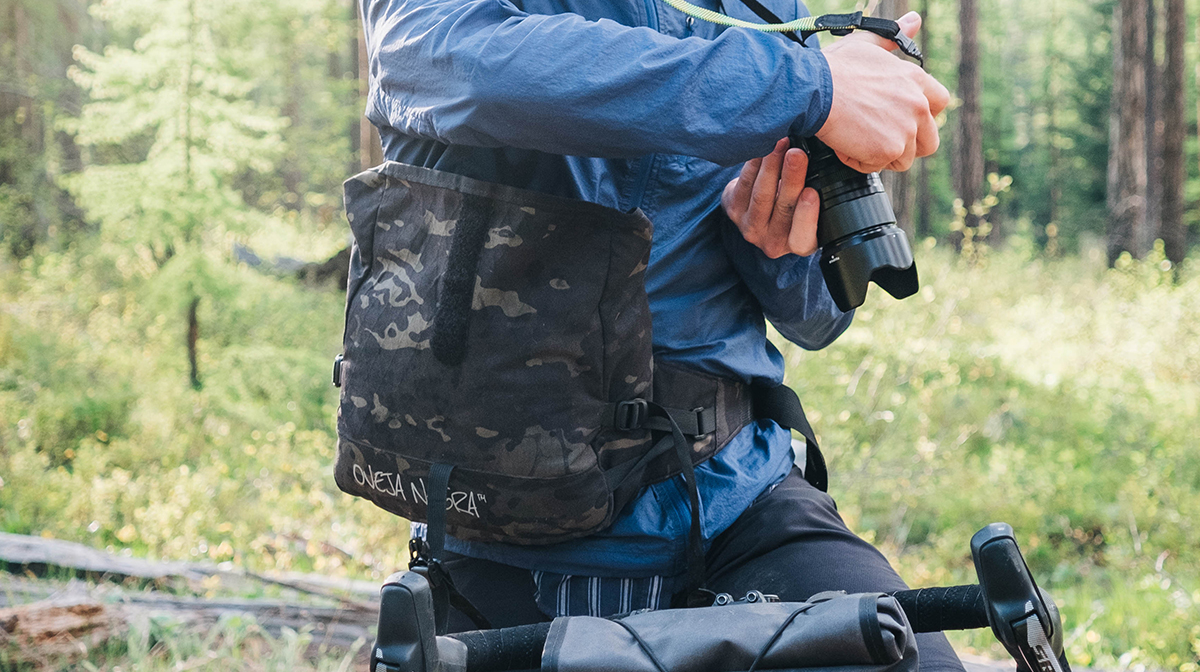
Oveja Negra Royale hip pack, $110 (Dan’s pick)
For lighter and smaller loads, I’ve come to really value the ease of access that hip packs offer over backpacks. To take a photo while riding with a backpack, I need to stop, take off the pack, rummage around through a black hole of candy wrappers and other nonsense while trying not to knock my bike over, pull out the camera, and take the shot. With a hip pack, I can easily access my camera without taking the pack off, so I take more photos and spend less time fiddling with gear.
The Oveja Negra Royale’s simple rolltop design and four-plus liters of capacity make it my preferred option for hauling camera gear. The Royale accommodates my cheapo Amazon camera insert, a Fujifilm mirrorless camera and lens, and an additional small prime lens. The adjustable rolltop closure allows the pack to expand or compress as needed, and the side compression straps make a world of difference in stabilizing loads by pulling them close to your body. A single zippered internal pocket works well for stashing SD cards, lens wipes, and other accessories. The only feature I feel is missing is a key clip. The Royale’s hip wings aren’t as padded as some of the other hip packs we tested, but I found the pack to be plenty comfortable on long rides as long as I didn’t overload it.

Camelbak Podium Flow 4 Hydration Belt, $60 (Ally’s Pick)
When I bring my Fuji X-T3 into the backcountry, I don’t bother with multiple lenses: my 27mm prime lens is perfect for the job. Not only does it take less fiddling to get a shot while I’m riding because there’s no zoom, it also makes for a much smaller camera profile since the lens is so thin. When I’m bikepacking, simplicity enables me to take more photos on the fly. I’ve found that when I’m not carrying it around my shoulder, I like having it lovingly tucked into one of the pockets of my Podium Flow 4 hydration belt — it fits perfectly, along with a shoulder and cross-body stabilizer strap. Having two zip compartments means that my camera can live in one and everything else can live in the other, which keeps things like gel packets, snack crumbs, and abrasive whatnots from interfering with the camera. A nice bonus is the water bottle holster that separates the zip compartments (and it comes with a 21oz water bottle!) Fully stuffed with four liters of gear, this small hip pack feels secure and stable with weight and bulk evenly distributed around my lower back. There are also plenty of smaller zip and elastic compartments to help with organizing. I don’t recommend this hip pack if you have larger lens or camera body, but if you’re carrying a minimalist setup, this hip pack is for you.

Patagonia Dirt Roamer Bike Waist Pack 3L, $69
If you’re in the market for a sturdy hip pack that can carry all of the things with the ability to compartmentalize, check out the Dirt Roamer Bike Waist Pack by Patagonia. With three liters of capacity distributed between three zip compartments on top of two water bottle holsters, you can carry everything you need for a day ride around your waist. I love the ability to compartmentalize (see above review); to make that work in a hip pack with this design, the waist strap needs to be supportive and comfortable. Patagonia did a great job with this one — though when packed fully, the big compartment can feel heavy on your lower back, the waist strap keeps things feeling snug in one place without too much sagging. It’s also rather breathable, which is nice on hot days, and the adjustment buckles hold well in bumpy conditions.
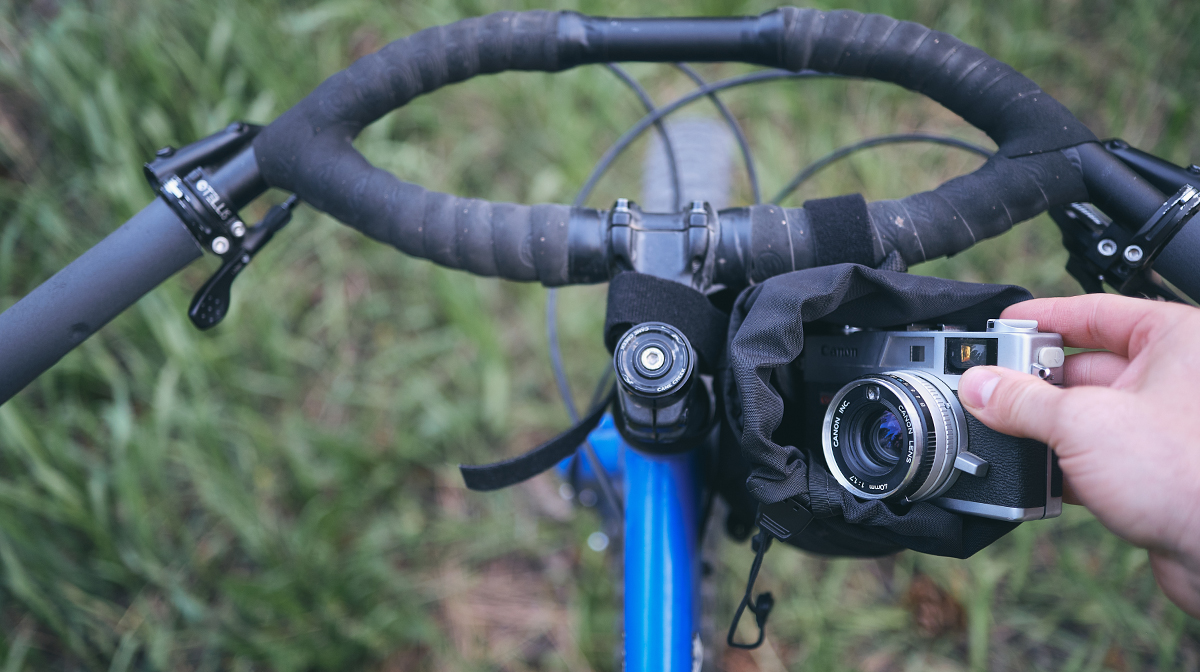
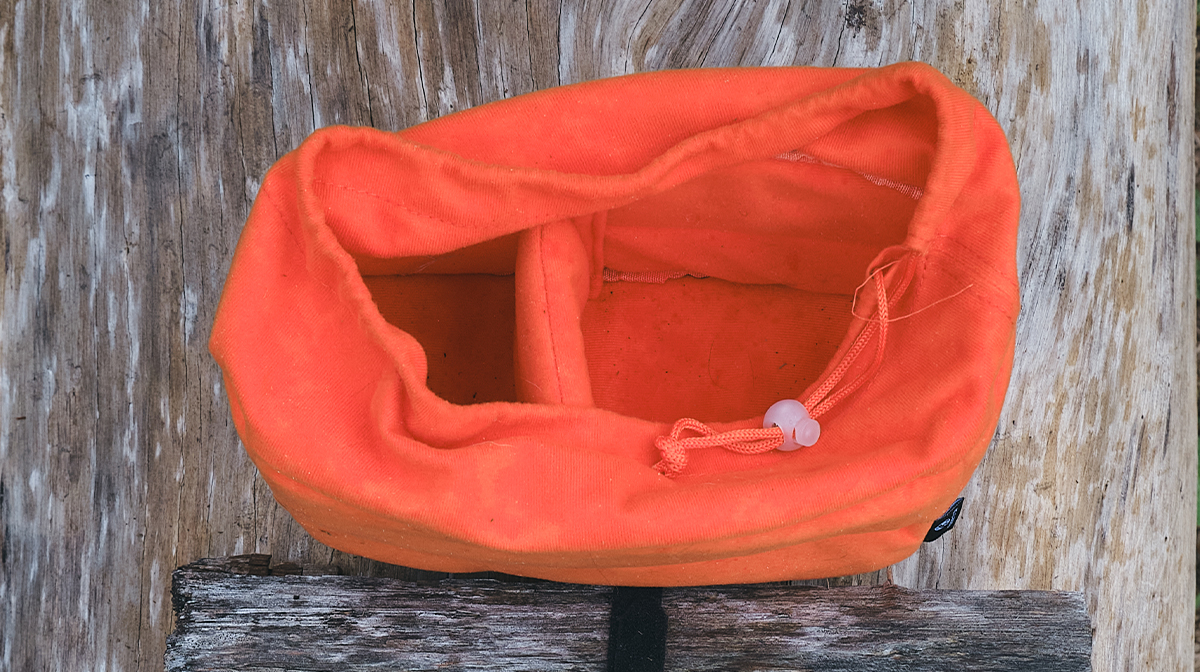
Road Runner Large Point ’N’ Shooter Stem Bag, $80
The Point ’N’ Shooter Bag is Road Runner’s XL version of the classic stem/feed/snack bag that’s designed to fit digital point-and-shoot or compact 35mm film cameras. Due to the cylindrical nature of this bag, camera compatibility is limited to those of the stubby lens variety. I tested this bag with a relatively svelte Fujifilm X-T3 and 35mm f2 lens, and I found it to be too small (RIP rubber eyepiece), but I could see it working well with something like a Fujifilm X100V, Ricoh GR, or a small mirrorless camera with a pancake lens. The Point ’N’ Shooter’s single drawstring closure maximizes accessibility, and the water-resistant lid helps protect your camera from the elements. One downside to stem bags is their propensity to get in the way when riding out of the saddle, and I found that the voluminous Point ’N’ Shooter was especially susceptible to knee strikes when pedaling standing up.
Gizmos
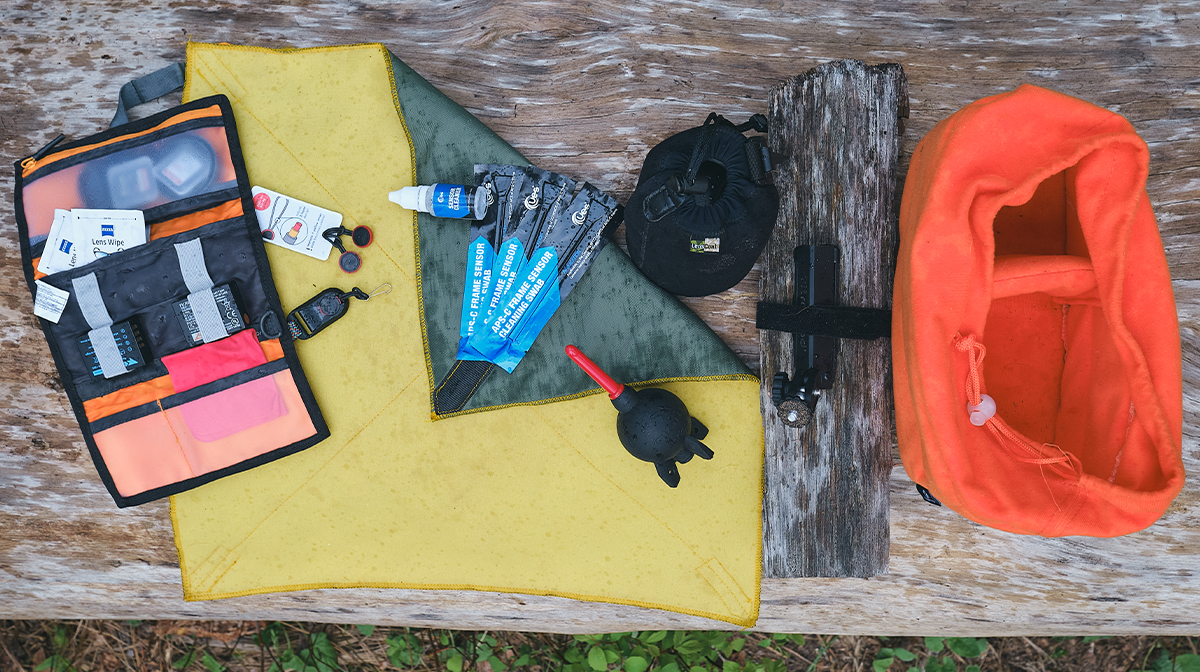
Technically, all you need to be able to take good photos on a bike adventure is a camera and a way to keep the camera safe. We’ve got a few tricks and gizmos up our sleeves to make things even a bit easier and take your photos to the next level. For example, any bag can be a camera bag with a padded insert. There are hundreds out there from which to choose.

Mirrorless digital camera sensors attract dust like cyclists to a box of free donuts. A sensor cleaning kit is invaluable for safely removing stubborn debris and smudges from your camera’s delicate sensor. Available in sensor-specific sizes.
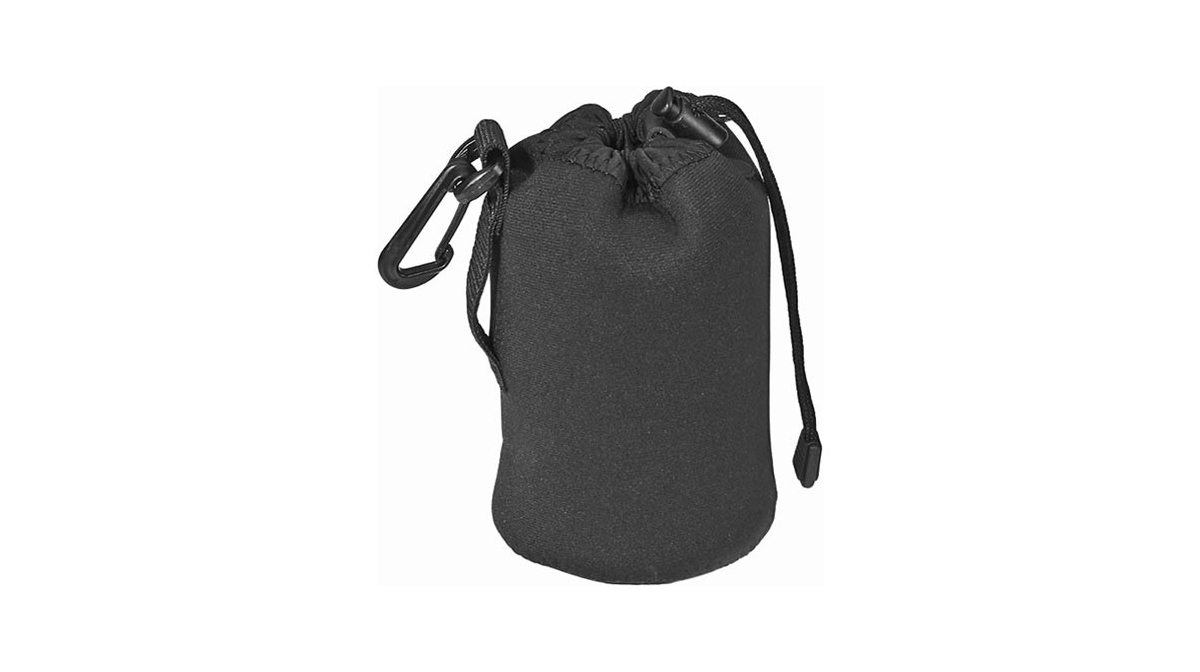
Keep lenses protected and accessible with these handy neoprene pouches. A sewn-in loop and plastic clip makes them easy to strap to the outside of a pack so you aren’t always digging through your gear when you need to switch lenses.

Of all the different types of ways to attach a camera body to a camera strap, Peak Design Anchor Links are by far my favorite. They’re simple, sturdy, and reliable — if you regularly swap straps out, like from a shoulder strap to a wrist strap, for example, having Anchor Links on every strap eliminates the headache of unthreading and relooping each time. A lot of our favorite straps have the option of upgrading to Anchor Links.
The system is simple: the Anchor is the little circle button attached to a loop — tie a cow hitch loop (Google it) on each of your camera’s strap attachment points. Once your Anchors are in place, you might never have to remove them again! The Anchor housing attaches to the ends of your camera straps and the Anchors pop in easily and pop out with a little front-to-back squeeze. Each Anchor Link is rated to hold 200 pounds, which might be overkill for a 1.5-pound camera, but at least you know you never have to worry about them failing!
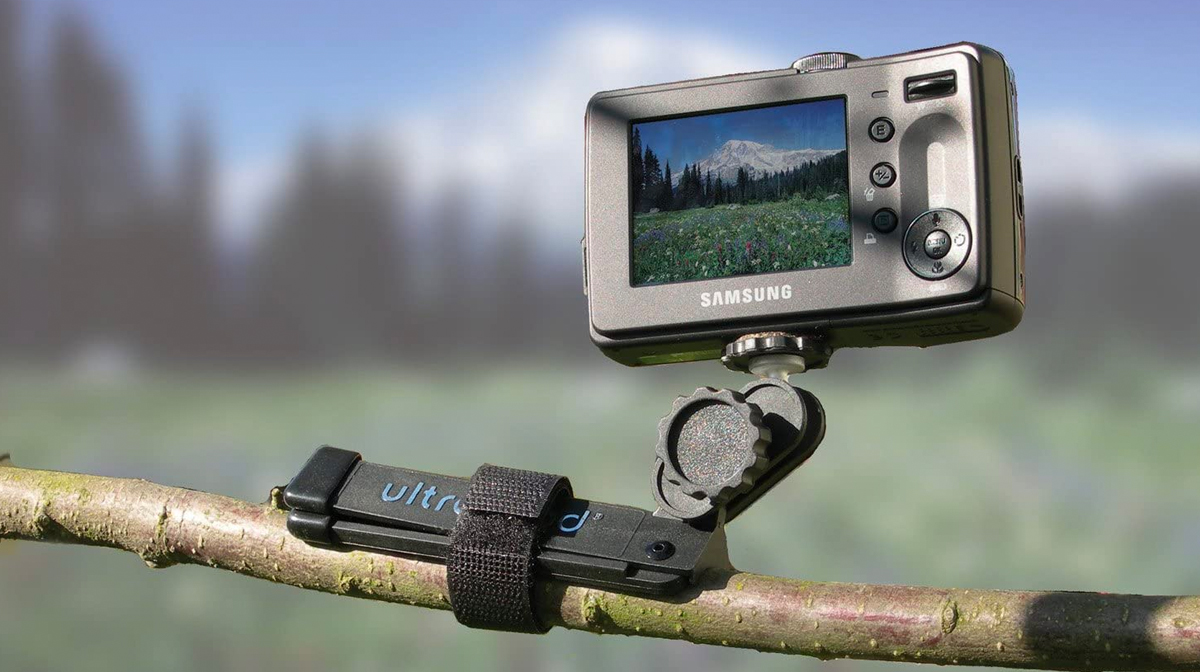
At only 4.3oz, the Pedco Ultrapod allows you to get those long-exposure and self-portrait shots without the bulk and weight of a full-size tripod. The mini ball head is surprisingly sturdy, and the included Velcro strap makes it easy to attach the tripod to a tree branch, fence post, etc.

Giottos Rocket Air Blaster, $17
It’s a dusty, dirty world out there. Quickly blast away grit and grime from lenses and sensors with the Giottos Rocket Air Blaster. I always pack the small version when I’m out shooting and have a larger version at home for dealing with extra dusty situations.
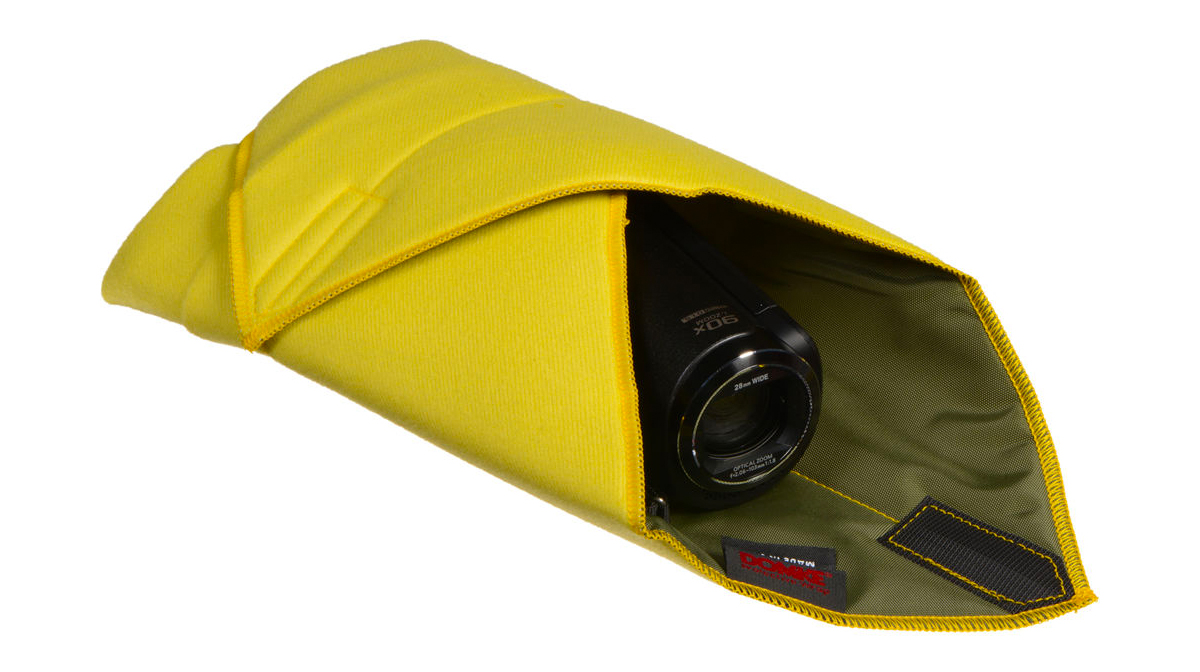
These padded nylon wraps are a no-fuss way to protect cameras, lenses and other delicate items without adding a lot of bulk to your bag or pack. Available in a range of sizes to fit most lens/camera setups.
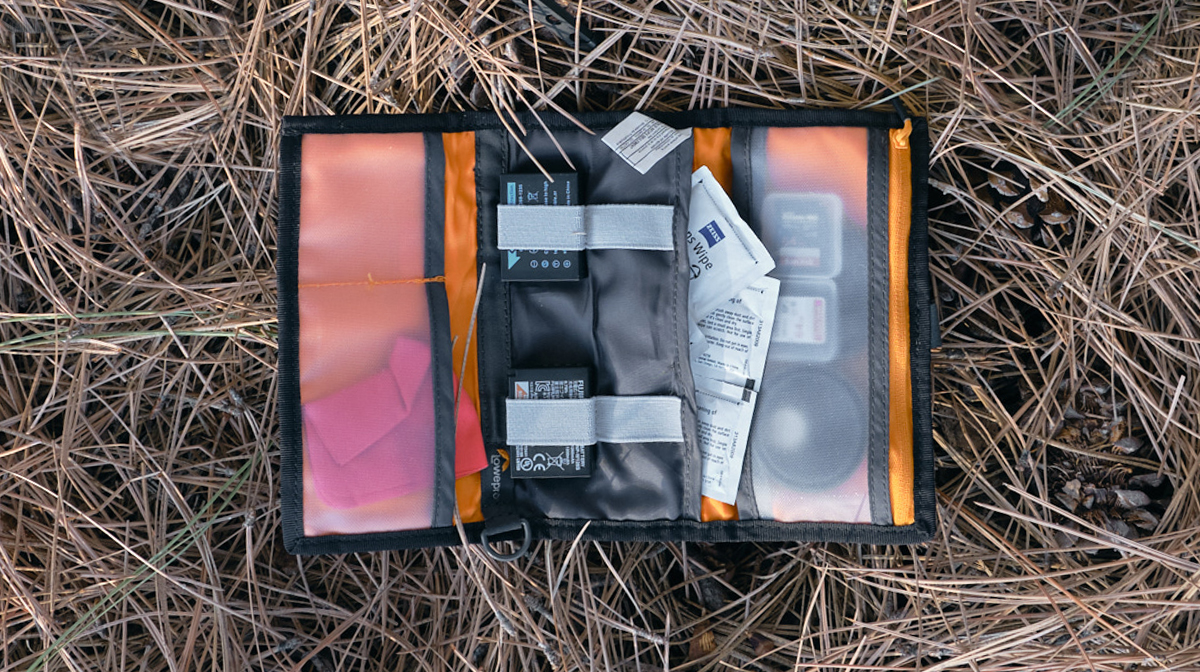
This is a great little organizer for extra batteries, SD cards, lens wipes, and other small photo accessories. The elastic hook closure makes it quick to get in and out of, and I find it’s the right size for carrying all the odds and ends I need for a photo outing.
Koolertron Shockproof camera bag insert, $20
Camera inserts can turn any bag into a dedicated photo bag. Inserts are available in a wide range of sizes, so it’s useful to know the dimensions of the bag you’re adapting before buying one. Inserts are available from established photography brands such as Shimoda and Peak Design; I happen to use a cheap “Koolertron” insert from Amazon that works well for my purposes.