Self-contained Bicycle Travel Tips
There’s a lot to think about when you’re getting ready to leave on your big self-contained tour. Here are some odds and ends for you to contemplate.
As the big day approaches, make sure you:
- Make final purchases of clothing and equipment.
- Make certain that all repairs and maintenance, including lubrication, are made on your bike.
- Buy an extra pair of glasses, or contacts, and get a copy of your prescription.
- Continue your training rides, working up to 50- to 70-mile day rides on weekends. (You might try for a century — 100 miles in a day — if you’re taking a trip of more than three weeks.) Seek out hills and varied terrain, attempting to simulate the type of riding you’ll encounter on your tour, and do some rides with fully loaded packs to test for proper weight distribution.
- Make arrangements for paying any monthly bills coming due during your absence.
- Make sure you have used all your equipment and know how it works. Make all final adjustments to your bike.
- Continue training rides; try to do at least one overnight "shakedown" trip with a fully loaded bike. It’s better to discover and take care of problems before your tour begins.
- Pack your bike in a reinforced box and ship it, if it’s not traveling with you.
- Pick up your travel tickets.
- Buy traveler’s checks for emergency and spending money.
- Fill medical prescriptions to last longer than your trip.
- Cancel your newspaper delivery.
- Change mail delivery or have mail held at the post office.
Some "Rules of the Road" that have evolved during the more than 20 years that Adventure Cycling has been running tours are based on what we’ve learned from actual on-the-road experience:
- A helmet (ANSI and/or Snell approved) should be worn while riding.
- Headphones should not be used while riding. Awareness of what’s happening around you is very important.
- Obey traffic laws and ride safely; try not to ride two or more abreast.
- Never operate a stove on a table where people are sitting.
- Whenever stopping, get at least 10 feet off the road. If there isn’t room to do this, ride on to a safer area.
- Don’t park bicycles against windows, gas pumps, or near doorways.
- Wash dishes at your campsite or at a designated "slop sink." Do not wash dishes in restrooms, at pumps, or at water taps. Soap should never be used in streams or lakes.
- Never take personal food into a restaurant.
A major credit card is a good emergency backup but should be supplemented by traveler’s checks. Budget enough money for daily incidentals such as postage, snacks, souvenirs, and beverages.
Weather
The rule regarding weather is to prepare for the worst but hope for the best. In western states, be prepared for any kind of weather, including hot days (100° F), rain, snow, and cold nights (below freezing is possible) any time of the year. Weather in mountainous areas is particularly varied and unpredictable. Humidity is often lower, and dehydration is a concern.
Drink plenty of fluids even when you don’t feel thirsty. In the Midwest and East, humidity can rise above 90 percent and, when combined with high temperatures, can be draining. A rule of thumb for avoiding dehydration and low energy levels is to drink before you are thirsty and eat before you are hungry. Some groups opt for early departures to avoid the midday heat.
People vary in their ability to adapt to high altitudes. Being in good physical condition seems to help, and participants may wish to arrive early to acclimate themselves to higher altitudes.
Paperwork and Mail
Want to get encouraging hand-written notes while on your self-contained bike tour? Before you leave your starting location, send friends and family copies of your itinerary with arrival dates penciled in for any mail stops. Encourage them to use the following format for addressing mail; it could mean the difference between a letter reaching you or not.
Hold for arrival (date)
(skip two lines)
Your Name
General Delivery
Town, State, Zip
Post offices will hold general delivery mail for two weeks and if you fill out a change-of-address form listing your next mail stop, will forward your mail for up to 30 days.
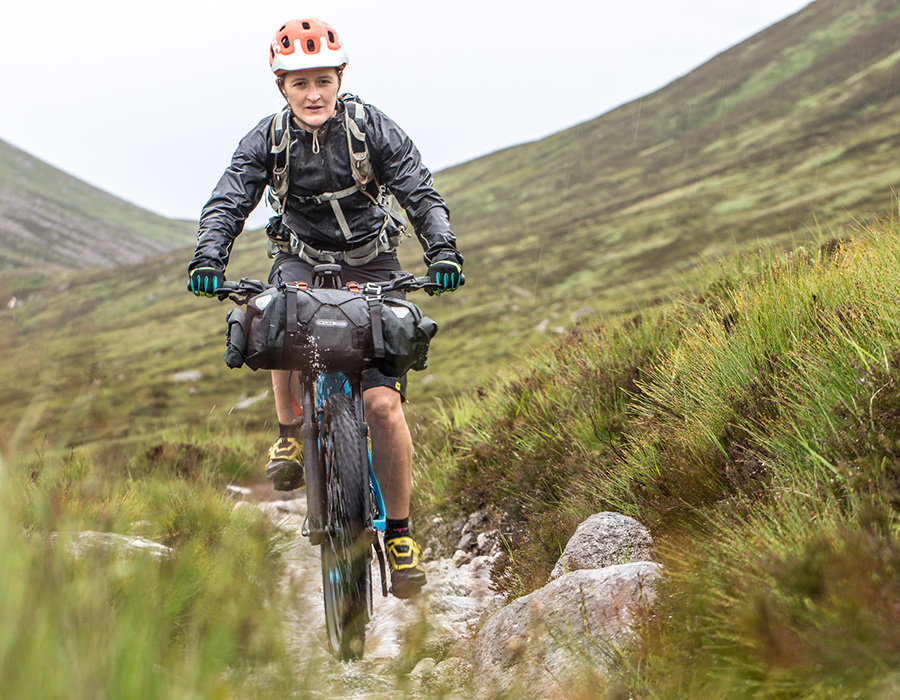
Mountain Bike Touring or Bikepacking
To best prepare yourself physically for your tour, ride your mountain bike as much as possible. If you don’t own a mountain bike and you’re renting a bike for the tour, ride your road bike as much as possible before the trip begins. If you have hills nearby, seek them out to prepare yourself for the ascents found on many mountain bike routes.
Because of the upright positioning and the need to occasionally "hop" your front tire around in rough terrain, bikepacking requires a bit more upper body strength than does road touring. You would be wise to include some upper-body work in your training program: push-ups, pull-ups, workouts on a rowing machine or with weights — or anything else that gives your arms and upper torso a good workout.
Opportunities to refill water bottles are very limited along mountain bike routes. It is best to carry two to three large water bottles. Participants who live at low altitudes may want to arrive a couple of days early to adjust to the altitude. Steep climbs at high elevations can cause shortness of breath and general fatigue. Be prepared to climb more slowly as you adapt to higher altitudes.
Brakes
Using side-pull, center-pull, cantilever, or disc brakes is a matter of personal preference. Whichever style you use, a quality brake will have little "give" once the pads touch the rim or rotor.
Handlebars
Dropped handlebars, standard on touring bicycles, or upright handlebars with extensions on mountain and hybrid bikes, work well. The key is to have a variety of hand positions available to prevent pain or numbing of the hands.
Where to Buy
The best bicycle will fail if it is not properly assembled. Beware of "a good deal" through the mail or from anyone other than a reputable bike shop. Selecting a dealer who conscientiously assembles and guarantees the bicycles they sell is even more important than the name on the bike.
You’ll be surprised by how well your body can adapt to new physical challenges. But unless you adequately prepare, the first few days on tour may be unpleasant — or even bring your trip to a grinding halt.
Caution
You should get a thorough physical exam by a medical doctor before your tour. If you are over 30 and have any doubts about your condition, consider having a stress test and EKG; a sports-oriented doctor would likely be versed in the special demands put on the body by cycling. Let your doctor know that you will be doing a bicycle tour averaging from 30 to 70 miles a day (depending on the tour).
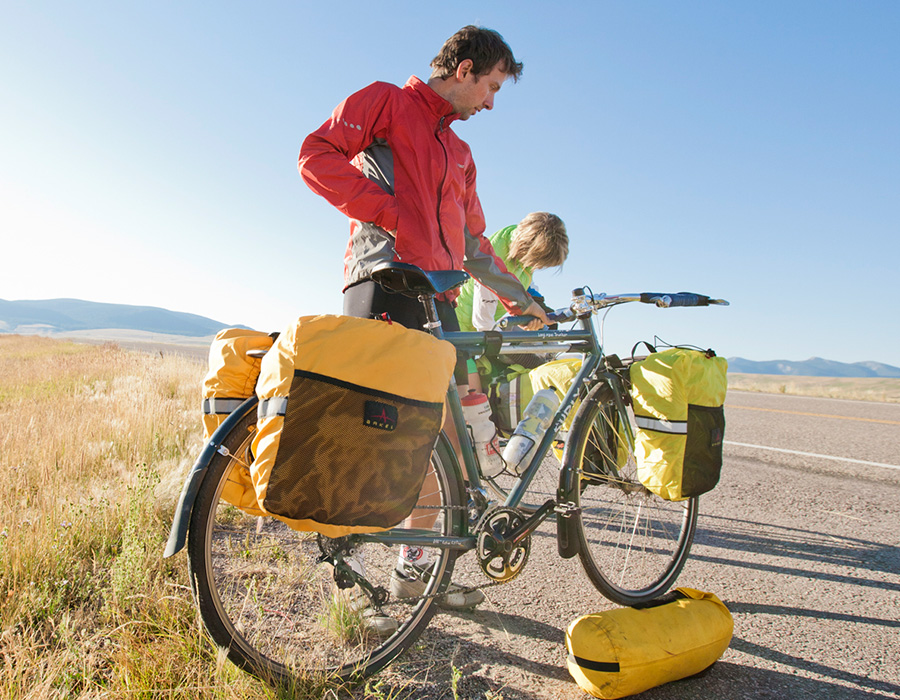
On self-contained tours, you’ll carry between 30 and 45 pounds, including food and cooking equipment. Elevations may be in excess of six to nine thousand feet, and temperatures could be above 100° F at times, depending on the trip.
Touring by bicycle often leads you through areas where medical care is not readily available. Tell your physician about the special stress your body will experience while touring: on the cardiovascular system, eyes, and skin (from sun and wind); muscles and connective tissues (especially knees); nerves in your hands (from road shock); and the gastrointestinal system (from varied water sources, irregular meal times and contents, and sustained daily exercise).
Conditioning
Begin your training at a mileage that feels comfortable, whether it is 5 miles or 25 miles. Try to ride three to four days per week. Gradually increase mileage, working up to 70-mile day rides over the course of a few weeks.
When training for a tour, riding speed and training heart rate are less important than endurance and time spent on the bike. The goal is to eventually ride several consecutive days (as you will on tour) and spend as much time as possible in the saddle. Commuting to and from work is one way to do both.
Be sure to take some long rides fully loaded, to "feel at home" with the added weight of full panniers or trailer. Ideally, you should take at least one overnight trip, which will help you determine if you’ve packed wisely and give you a chance to test your equipment while there’s still time to make changes or adjustments.
Lastly, it is important that you avoid overtraining. If you should begin to feel increasingly tired, depressed, or irritable, or begin to dread riding, you may be training too hard or too often. By the start of your tour, you do not want to feel "burned out" or suffer from sore knees. Listen to your body and rest when necessary.
A Few Tips
- Relax as you ride, and take a break every hour.
- Eat frequently, in small amounts.
- Drink 4 to 5 quarts of water daily.
- Avoid injuring your knees; "spin" at a cadence of 70 to 90 rpm.
- Avoid numb hands (and road rash in the case of a fall) by wearing cycling gloves; gel padding is especially effective. Change hand positions frequently.
- To avoid/treat chafing, apply talcum powder or Cruex to the irritated area (if you’re not already wearing cycling shorts with a synthetic chamois — get some!).
- Bathe frequently.
- Launder your cycling clothes frequently.
Bicycle Adjustment
The saddle should be raised to the point where there is only a slight bend in your knee when your foot is at the bottom of the pedal stroke. If your hips have to swivel in order to reach the bottom of the pedal stroke, your seat is too high.
Knee pain is quite often caused by improper seat height. Pain in the inner or front portion of the knee is generally caused by riding with the seat too low. Pain in the outside portion of the knee is generally caused by riding with the seat too high. Handlebars should be placed level with, or at most an inch lower than, the height of the saddle; try different adjustments to determine what works best for you.
Riding Skills
To become familiar with riding a loaded bike, pack as you will for your tour. Find a painted straight line in a parking lot and follow it as closely as you can. Practice looking behind you; the bike will tend to veer to one side as you turn your head. Practice until you can look back without veering to either side.
A rearview mirror attached to your helmet or handlebars will make checking behind you easier and safer. Don’t make abrupt steering movements, especially on downhills or on slippery surfaces, or your tires may lose traction. Avoid pedaling when you’re leaning into a turn; your pedal or toe clip could catch on the pavement and cause you to fall. Hold the inside pedal at the top of the revolution.
Cadence and Gearing
The system of gears on multispeed bicycles lets you choose different pedaling rates or cadences. Spinning in a gear that is too low is tiring and makes for a choppy ride; pushing a gear that is too high (a common error) is a primary cause of knee problems and the major reason people must stop cycling on a tour.
Any time you feel the slightest twinge of pain in your knees, stop riding. Check saddle height and position to see if an improper adjustment is causing strain on your knees. When you resume riding, check your cadence. Skillful cyclists use a brisk, steady cadence of 70 to 90 pedal revolutions per minute, using the various gears to maintain a constant cadence over varying terrain.
Braking and Emergencies
A cardinal rule of bicycling is to brake before you must, especially on curves and downhills. Brake just before going into a curve; then, if you need to slow down more, brake gently with the rear brake while in the curve. Always apply brakes gradually. Never slam on just the front brake, or you’ll fly over the handlebars!
Use special caution on downhills. A loaded bicycle can accelerate rapidly, and rocks, loose gravel, vehicles and cattle guards can appear quickly when you’re moving at 30 or 40 miles-per-hour. Brake in a rhythmic on-again-off-again pattern, squeezing the brake handles firmly for a few seconds and then releasing the brakes for a few seconds. Continuous braking will glaze the surface of the brake pads and result in loss of stopping power.
Don’t begin your tour without practicing emergency braking. This entails three motions performed simultaneously: (1) Shifting your weight toward the rear of the saddle, while (2) moving your hands onto the brake handles, and (3) applying firm, even pressure to both brakes.
Challenging Conditions
Traffic is the greatest danger to cyclists. When a vehicle overtakes you, assume that there is a line of traffic following it and that the second driver has not seen you. Towing units and RVs are often equipped with mirror extenders that can clip an unsuspecting cyclist. Be attentive and ready to leave the road if necessary.
Watch for oil, wet leaves, loose gravel, railroad crossings, and anything stopped in the roadway. Be aware that when you are heading directly into the sun, motorists behind you are doing the same and may have difficulty seeing you.
Try to avoid night riding, but if caught out after dark, use lights and wear reflective clothing. Fog can be just as dangerous; it distorts depth perception and drivers generally have less experience navigating through it.