How to Ride the Annapurna Circuit
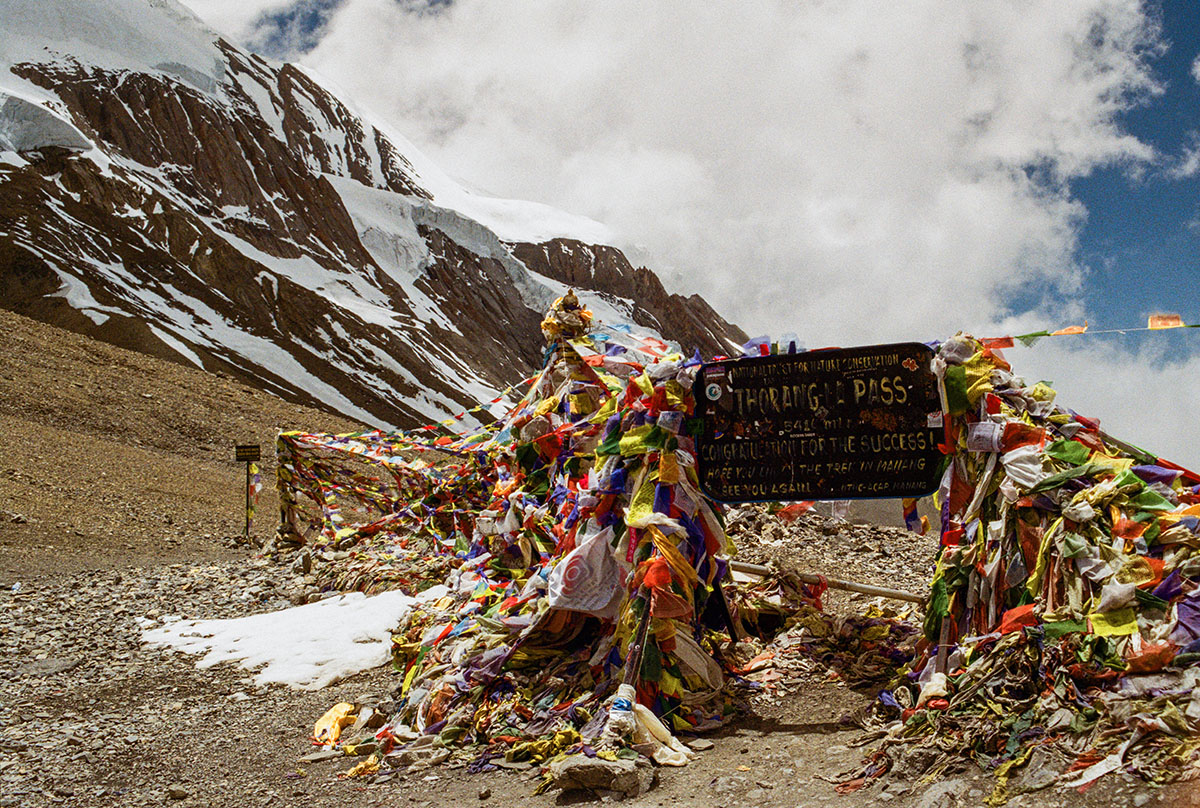
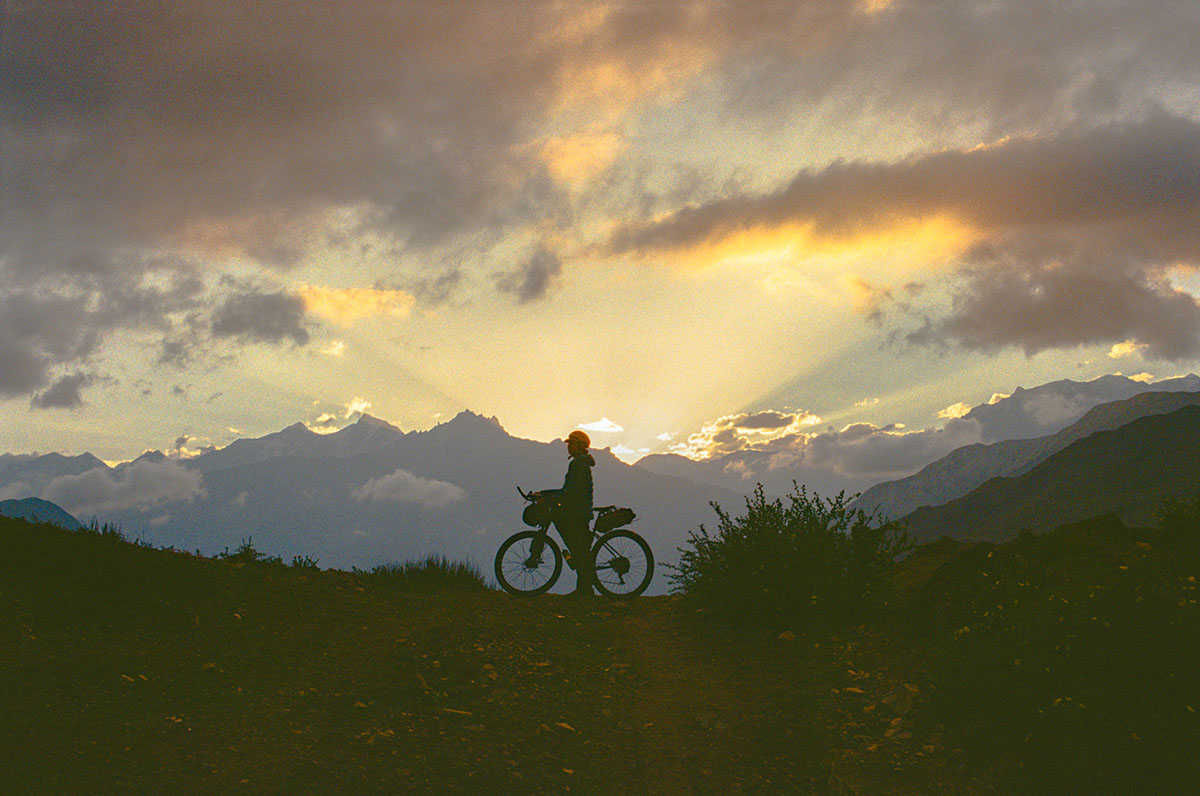
The Annapurna Circuit is an exceedingly popular trekking route in the Himalayas and tops out at one of the highest mountain passes in the world, Thorong La Pass at 5,416m (17,769 feet). Surrounded by some of the tallest mountains in the world, it attracts hikers, bikers, and climbers alike. My mother hiked this route 40 years ago, before it became the popular (and accessible) route that it is now. In the summer of 2022, I followed in her footsteps and cycled a modified version of the official Annapurna Circuit trekking route with my cycling partner Daniel Richards.
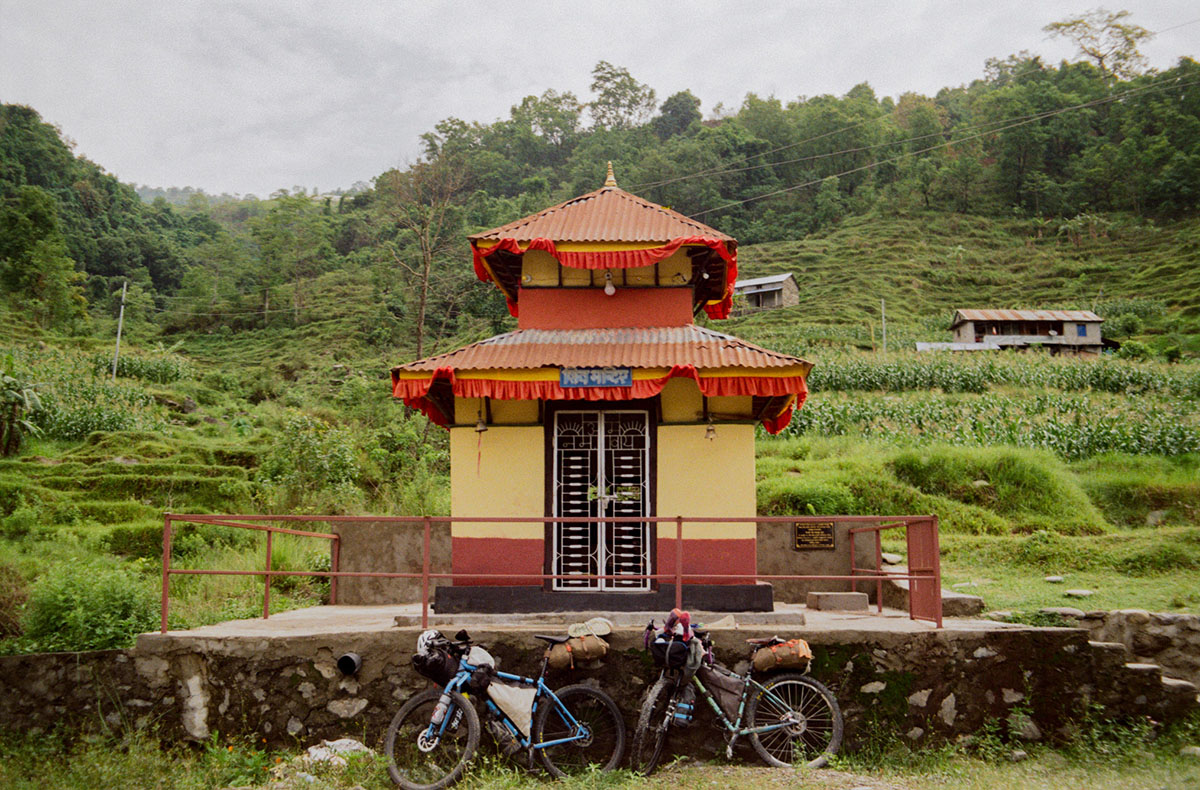
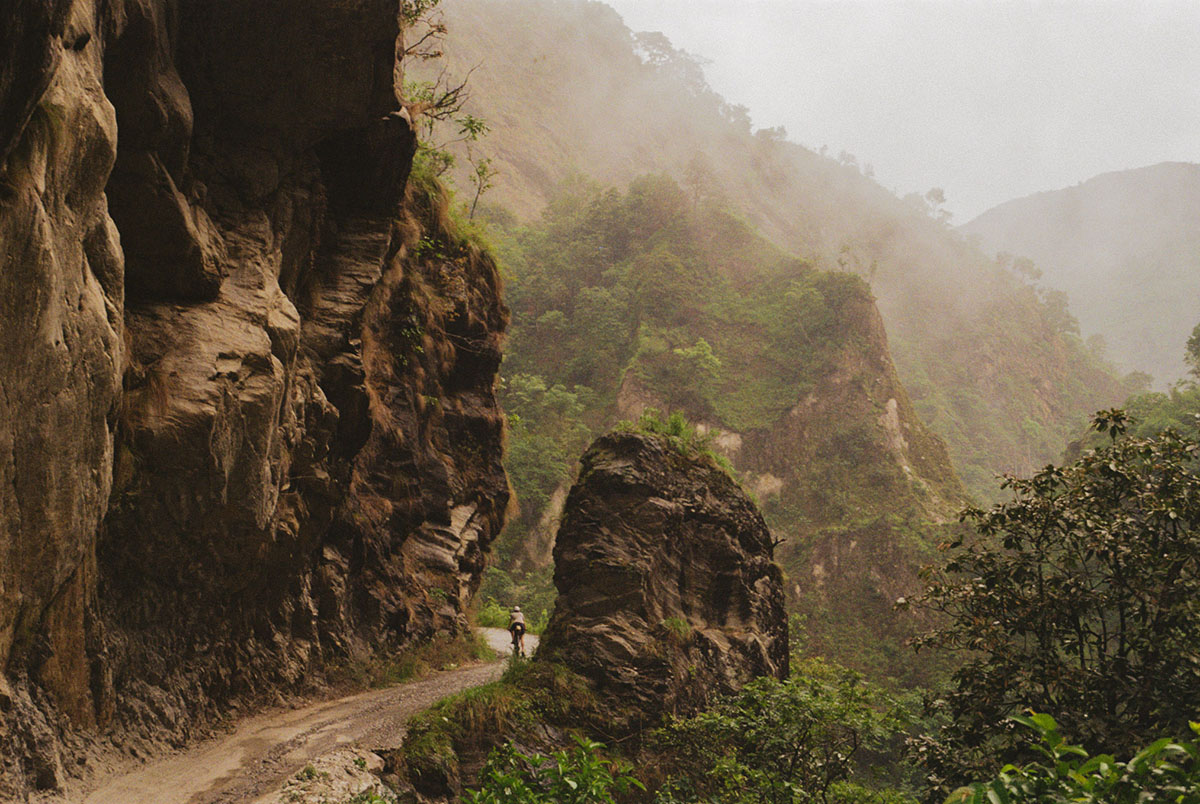
The route winds through a vast variety of climates: subtropical jungles, alpine forests, and desolate rocky terrain. What the route lacks in oxygen it makes up for in dramatic views, kind locals, and amazing cuisine. On route, the logistics are quite easy, food stops are plentiful, and no overnight reservations are needed for the tea houses. However, getting to the route and preparing everything in advance requires some coordination. I’ve written this guide to aid anyone who is thinking of doing the Annapurna Circuit or any other high-altitude routes in the region. While this guide should have something for everyone, it should be particularly useful for those with little experience in the region.
Annapurna Highlights
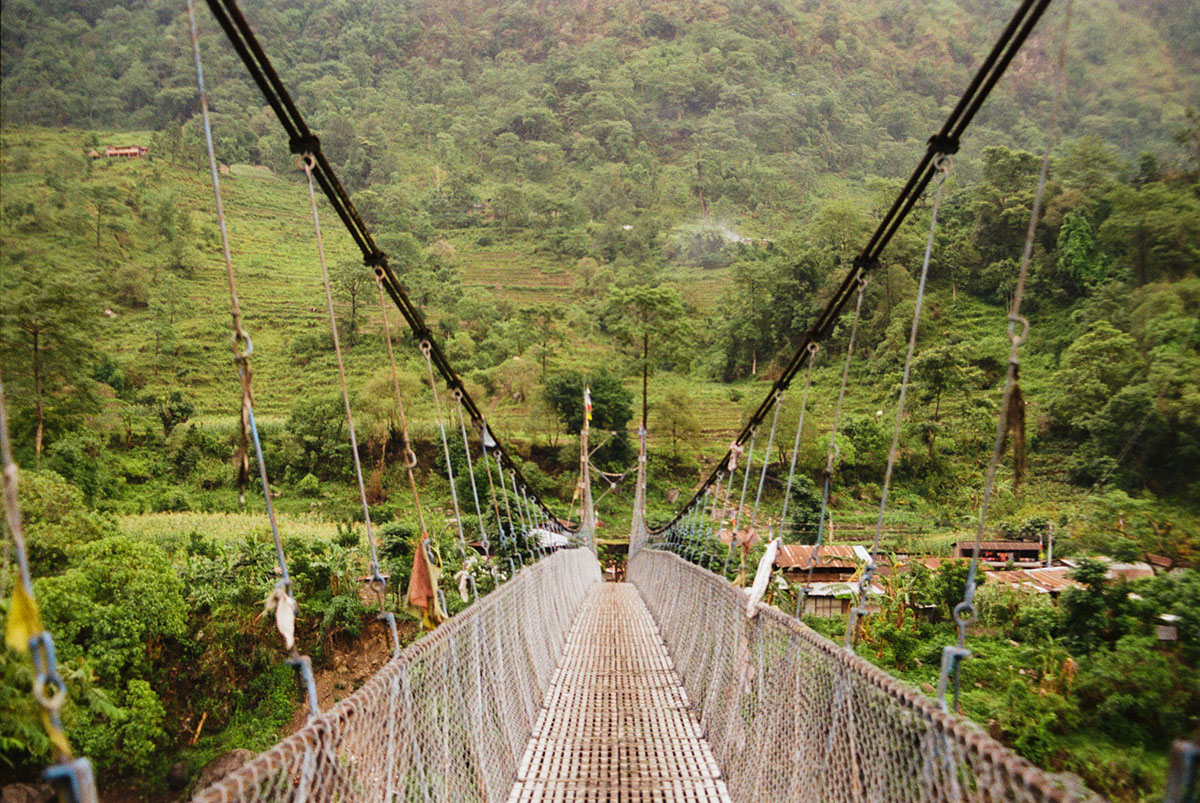
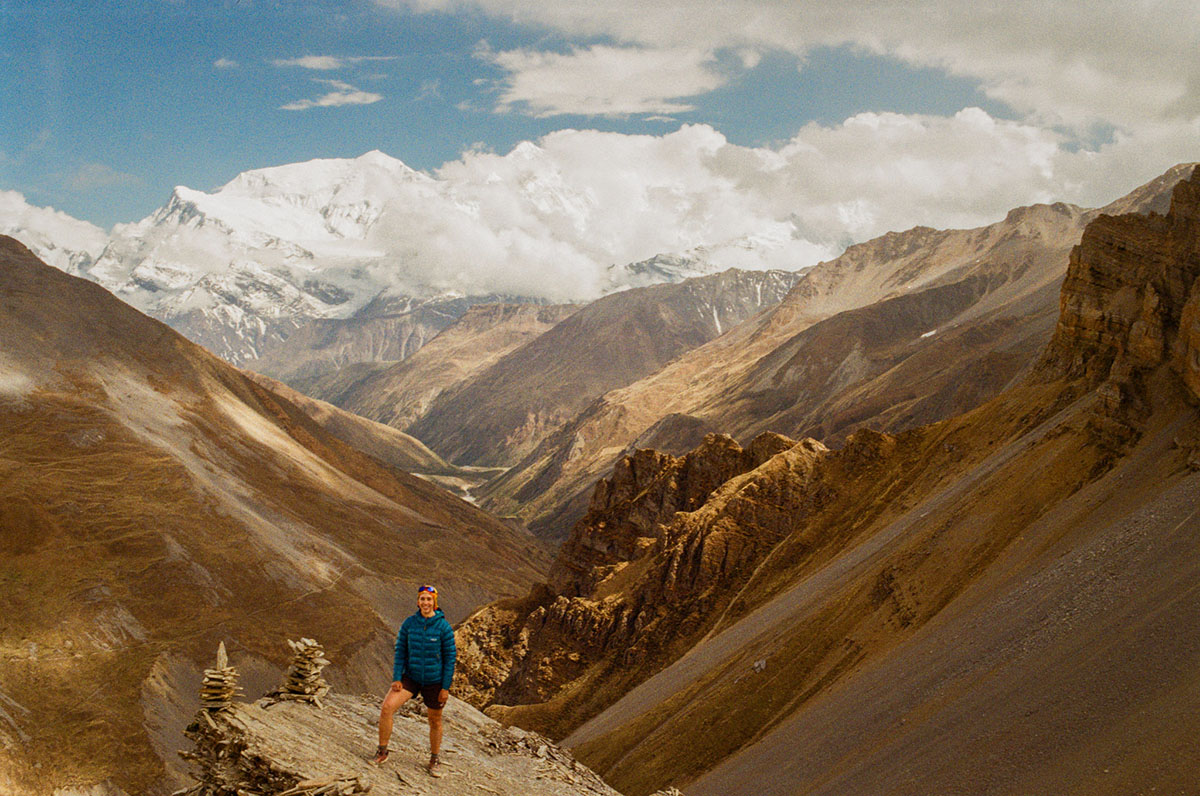
Expect spectacular scenery: jungles, rugged mountains, suspension bridges, monkeys, and yaks. Along your trip, you’ll encounter great food, kind locals, and countless prayer wheels. About halfway through the trip, you’ll have the opportunity for day trips in Manang, one of the most popular villages on route. In Manang, you can chat with other trekkers, visit high-altitude lakes, or stop by Praken Gompa, the nearby monastery. There will also be several opportunities to soak your sore muscles in hot springs along the way.
Route Basics
We followed the route and trip guide from Bikepacking.com and cycled the route counterclockwise for the primary reason that acclimating is easier in that direction. Due to our time constraints, we rode the route in 11 days, but in an ideal world I would prefer 13. We took five days to reach Yak Kharka, a small village past Manang, three days to reach the summit from Yak Kharka, and three days to get back to Pokhara. While the route is rideable throughout the year, the best times of year are April–May and October–November. It is not recommended to travel to this region June–September due to the monsoon season. While there are many amenities along the route, the route is incredibly challenging due to the high altitude. Go as light as possible.
Nepal Travel Requirements
Visas are required to visit Nepal. Fortunately they are available on arrival at the Tribhuvan International Airport in Kathmandu and at border crossings. Bring cash in advance for your visa. You can find out more at Nepal’s Department of Immigration website.
You will also need a permit to visit the Annapurna Region. You can get one of these at the permit office in Pokhara; note that these are also cash only. Although we came with printed passport photos for this particular use, the permit office offered to take our permit photos for free.
The CDC recommends multiple vaccines for travel to this area. While the standard dosage period for some of these vaccines is four weeks, sometimes it is the case that you can take an expedited track and finish your vaccines in less than one week.
Bringing a Bike
Some people opt to rent a bike in Kathmandu and bring that bike to the start of the route in Pokhara. However, if you’re like us and prefer to bring your own bike (and you’re flying to Nepal), you’ll have to deal with the standard flying-with-a-bike protocol, i.e., disassembling your bike, packing it, flying, and putting it back together. If this is your first time flying with a bike and you’re not keen on buying a bike box, you can usually go to your local bike store and ask for an old cardboard box, which they might give to you for free.
Once you start your route, you’ll likely need to store your bike box. Luckily most hotels in Pokhara will store your bike for free if you stay at the hotel for one or more nights. If you have trouble assembling your bike in Pokhara, there is a bike shop in town.
Different carriers have different protocols on flying with bikes. At the time of our trip, Qatar and Turkish Air were the only carriers flying to Nepal. Qatar Airways asked for $700USD each way per bike at the time of our trip; so we opted to fly with Turkish Air which charged about $80USD per bike each way. However, new information from Qatar Airways advertises that bicycles are included in checked baggage as long as the weight is under 32kg (70 pounds), making Qatar Airways the cheaper bike transport option.
Rig + Brakes
Hike-a-bike is inevitable on this trip, but if you want to minimize it, I’d recommend bringing a full suspension situation and opting for a backpack rather than bike bags. From my experience, it is more challenging to push your bike with bike bags compared to a backpack. My riding partner Daniel Richards brought a fully rigid bike, and I rode a hardtail, both fully loaded with bags, which worked fine for us.
High altitude can adversely affect hydraulic brakes due to the micro air bubbles expanding under pressure as you get higher. On a route like this that goes to very high altitudes, you are likely to encounter air bubble expansion in your brakes. If riding with hydraulic brakes, I recommend carrying a bleed cup. Some pro cyclists we met on the route mentioned that they bled their brakes with cooking oil from the tea houses and had no problems. While my bike does not have hydraulic brakes, I had my fair share of brake issues. During the trip, both my brake pads and my riding partner’s glazed, meaning we both lost all of our brake power. Glazing occurs when your brake pads get too hot and glaze over, meaning that your pads no longer have the necessary texture that enables them to stop your bike. Pads get too hot when facing consistent use downhill, taking a break or “pumping” your brakes can help prevent pads from getting too hot. However, I would highly recommend bringing a backup set of brake pads for this reason alone.
Terrain
I agree with Bikepacking.com that the route is about 85 percent rideable. However, rideability might change depending on your bike, ability, and style of riding. From Yak Kharka to the peak (12km), the terrain is quite challenging due to altitude, rockslides, and general steepness. We hiked our bikes for most of this, but had we been more acclimatized, we would have been able to ride more of the terrain leading up to the peak. Other bikers, instead of pushing their bikes up the hill, carried them on their backs. The 10km after the peak was also unrideable for us due to the very rocky terrain; a full suspension might do better on this. Besides the area near the peak, you’ll encounter rutted jeep tracks, rocky terrain, mud, and may find yourself walking on occasion.
Getting to the Route
If you’re not living in a country near Nepal, it is likely you will arrive in Nepal via the Tribhuvan International Airport in Kathmandu. From there, you will need to arrange transport to Pokhara. The route starts in Pokhara, a major city in the region. After arriving in Pokhara, setting up your bike, and attaining the necessary permits, you can start the route immediately.
Pokhara can be reached by plane or by bus. We opted to fly from Kathmandu to Pokhara on a 30-minute flight. We were able to buy our tickets to Pohkara at the Kathmandu airport 30 minutes before our flight. Flights between Kathmandu and Pokhara leave every 30–60 minutes. The return flight had to be bought in advance over the internet as there was no ticket sales counter at the Pokhara airport.
You can also opt to take a bus to/from Pokhara and Kathmandu. Many people opt to take a bus from a safety standpoint, as flights within Nepal are known to be dangerous. The bus takes around seven hours to cross around 200km, as reported by a local bus service.
On-Route Logistics
While the terrain of this route is exceptionally difficult, the ease of logistics make up for it. Along the route are tea houses that offer you a place to stay and warm meals (some even offer warm showers). Tea houses are common accommodations found on most trekking routes in Nepal and offer accommodations ranging from simple to extravagant. While they offer western meals, they also offer delicious local food such as momos (a delicious type of dumpling accompanied with a spicy sauce) and endless refills of dal bhat (rice with lentils, vegetables, and other tasty sides). Many of them sell snacks so there is no need to buy all your snacks at the start of the trip and ration them. Consider tea houses your one-stop shops along the route, simple private accommodations, meals, and snacks all in one.
After leaving Pokhara, you can expect to mostly be visiting villages without major grocery stores, pharmacies, and hospitals. Despite not being near any major hospitals, the route is quite popular, and if an emergency arises it would be possible to hire a ride/mule (or helicopter depending on the area) back to Pokhara to get help. The major villages (Besisahar, Muktinath, Jonsom) along the route will offer some minor grocery stores, small pharmacies, technology shops, and more.
However, all of these places are cash only, so remember to pull out all the cash you need in Pokhara (there are also several ATMs in Jonsom). We budgeted €15–20 per person per day.
Despite these easy logistics, few bike shops are on route. We only encountered one minimal shop in Jonsom and several in Pokhara at the start of the trip. Be prepared to do your own bike maintenance and bring all the tools you may need.
High Altitude
This route goes up to altitudes that are classified as very high. If you’ve never been to altitudes that are classified as such, I highly suggest talking to a travel doctor about altitude sickness: when to expect it, prevention options, symptoms, and treatment. The altitude is the biggest challenge that riders face on this trip. At times, it was difficult to catch my breath, and I found myself feeling nauseous throughout the day. Despite the easy incline of some of the hills near the peak, I still found myself unable to ride them due to the lack of oxygen at high altitude.
While the altitude is unavoidable, there are some things you can do to make your travels easier and safer such as acclimatizing in Manang. Manang is a beautiful town at 3,500m (11,482 feet) with many day hikes and religious sites nearby, making it the ideal acclimation spot. There are also doctors in Manang that give altitude talks during the peak season. Taking an acclimation day is not the same as a rest day; instead, acclimation days allow the body to get adjusted to the lack of oxygen at high altitudes. Learn more about the importance and process of acclimation days.
Above 3,500m (11,500 feet), it’s recommended that you sleep no more than 500m (1,640 feet) higher than the previous night. This means that you can climb more than 500m in a day as long as you return to an elevation no higher than 500m above your starting point for the night.
At very high altitudes, life-threatening illnesses such as high-altitude cerebral edema (HACE) and high-altitude pulmonary edema (HAPE) become a risk. Educate yourself on these illnesses and discuss HACE and HAPE with your travel doctor. Our travel doctor recommended medication for HACE and HAPE, but it varies on a person to person basis. Learn to recognize the signs and descend immediately if experiencing symptoms or moderate or severe Acute Mountain Sickness.
Trip Specific Gear
- Glacier glasses: at high altitudes, the sun can burn your eyes causing short term and long term damage. Glacier glasses protect your eyes from all angles.
- Bug spray: mosquitos are common at low elevations, and we were not able to find any spray in Pokhara or along the route.
- Polarized camera lens: to cut through haze if you plan on doing film photography.
- Way to carry your bike on your back if you plan on carrying your bike rather than pushing it.
- Water purification: most water on the route is not treated. For purification I brought a dropper with a water-purifying solution to avoid the weight and size of a filter. Filters don’t filter out viruses, which are found in water in Nepal; be sure your water-purifying solution can eliminate viruses such as a SteriPEN or iodine tablets.
- Bike repair tool kit
- Brake pads and bleed cup (see section Rig + Brakes)
- Sleeping bag and liner: it is possible to get scabies/bed bugs after staying at the tea houses; bringing your own sleeping bag and liner can help prevent this.
- Medications you might need in an emergency: pharmacies are few and far between on the route. Talk to your travel doctor before departure and acquire any necessary medications at your local pharmacy.