From Selfie to Self Portrait
“The best camera is the one you have with you,” or so goes the old saying. With smartphone cameras that blow away the performance of point-and-shoots from just a few years ago, it’s never been easier to not only have a camera with you, but to have a pretty darn good one.
Don’t be fooled, though — it still ain’t easy. “Golden Hour” and “dinner” are often vying for the same reservation, photos of making coffee mean that you haven’t yet consumed the coffee, and waiting for the light to get right means just that — waiting. Not to mention you can only ask someone to ride up a hill while you fiddle with camera settings so many times before you find yourself riding alone.
Whether intended or not, a solo cyclist faces unique challenges when it comes to getting good images. There’s nothing wrong with the occasional selfie, but elevating your images to self-portraits takes planning, time, creativity, and patience. With the right gear and the right approach, your next shot can be your best shot. Just ask these folks.
Steph Ridenour
Who: A young world traveler who hit the road after college and hasn’t looked back.
Credentials: February 2016 and August/September 2018 Adventure Cyclist cover photos, envy-inducing Instagram feed
See more: @stephgoesglobal
I graduated from university in Canada in April 2015. The rush of freedom was so sudden that I couldn’t even wait for my degree to arrive in the mail before setting off. My bike was in a box on its way to Iceland before my grades had come back. For the next four months, I retraced and extended a route through Western Europe that my parents had taken me on when I was nine years old. As a kid, I viewed the six weeks spent on my own small bike as punishment. I felt that I was being forced to waste my summer vacation. Something must have stayed with me though, because I spent the next 13 years on bikes, knowing that I could get anywhere I wanted.
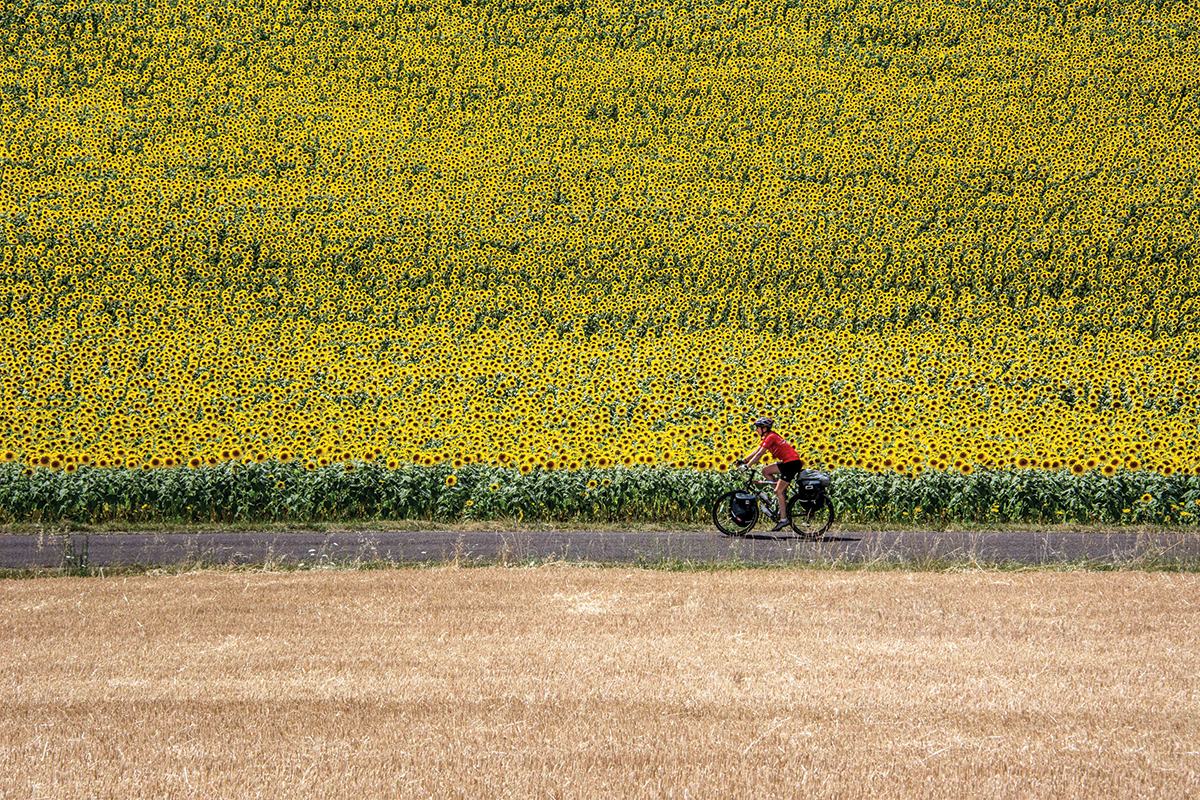
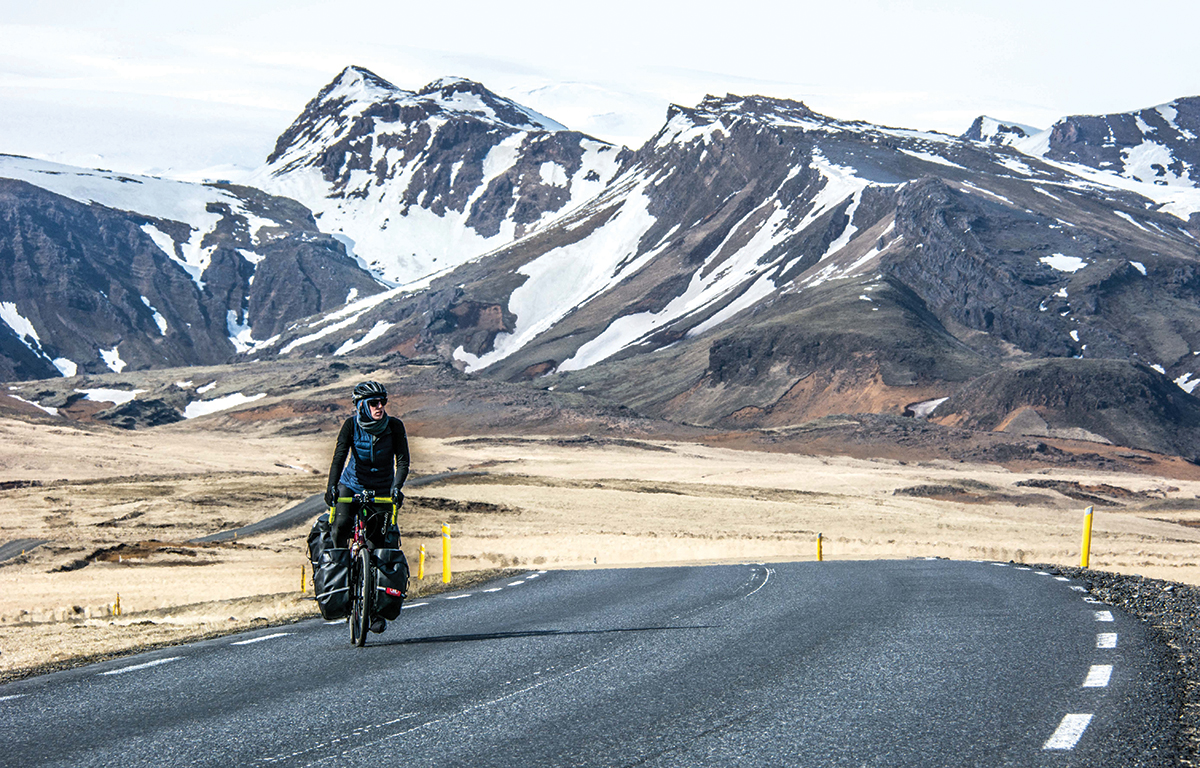
When I left Canada in May, my goal was to capture the realities of a cycling journey: the solo cyclist amid amazing landscapes, a lonesome tent in the wilderness, the hardship and joy of the French Alps, and the freedom that comes with having your own wheels. What I learned is that taking self-portraits on a bicycle requires patience, experimentation, and trial and error.
New angles are usually found by accident or by purposeful exploration — a walk up the hill for a snack might unveil a view of a road that winds into the distance. I avoided cycling’s “tunnel vision” by imagining what a shot might look like taken from all angles, and I chased the ones I thought would make good photos. I tried to stop for my water, bathroom, and food breaks in places I could explore in search of interesting perspectives. I put in a little extra work to haul my camera up road banks to see the scene through my lens and decide whether it was worth setting up for a shot.
The camera should be put on something sturdy — preferably a tripod, although a concrete road barrier will also suffice — and be set on interval timer or self-timer. Interval timer tells the camera to take a photo at predetermined intervals, such as two seconds (the setting used to take time lapses), which is an advantage over a self-timer because it gives you more than one try to get a shot just right.
Framing a photo when I couldn’t tell where my subject (myself) would be was difficult. I used references to frame the shot, such as recognizable groups of flowers or rocks, so that when I jogged back to my bike 60 feet away I knew I should be a few feet to the right of those rocks for the picture I wanted. If the photo was of my camp, my reference was my tent location. After I’d moved through the frame a few times with my bike, I checked the photos and then adjusted my location if I needed to.
There is no wrong way to take a self-portrait; the more I experimented, the faster I learned what I liked and what didn’t. The only mistake I made was not bothering to stop and take the shot. I never knew if something was going to work out until I tried it.
Roff Smith
Who: The guy most of us want to trade lives with. Author, bicycle adventurer, certified bike mechanic and wheel builder, and regular contributor to National Geographic.
Credentials: National Geographic, need we say more?
See more: roffsmithphotography.com
We’ve all been there — pedaling across a dramatic landscape or spinning along a particularly lyrical stretch of country road, seeing the scene in your mind’s eye and wishing there was some way you could capture the beauty and freedom of that moment. Preferably something a little more meaningful and evocative than a static picture of your bicycle propped against a tree, fence post, or guardrail.
Happily, photographing yourself while pedaling — whether on a tour of a lifetime or your early morning ride — really isn’t difficult. Better still, it doesn’t require much in the way of costly (or weighty) gear. A simple point-and-shoot camera and a lightweight tripod are all you need.
To be sure, a DSLR offers more versatility in lenses and capabilities but at the cost of weight — not only in the camera body and the lenses, but also in the weight of the tripod necessary to hold it steady while you ride through the scene. The quality of images produced by point and shoot cameras these days is incredible. I shoot for National Geographic’s image collection, and my self-shot images, created on my morning rides with my compact camera, are regularly accepted for use.
Because I typically ride in low light — at dawn or even before — I shoot in RAW so I have the ability to fine-tune my exposures later. This is one of the reasons I prefer to use a compact camera rather than a smartphone. Many compact cameras, such as the Canon G1X I use, have reticulated screens, which make it easy to compose if your camera is at an angle, as well as features that allow you to adjust the delay on your self-timer and the number of frames it will fire once it triggers the shutter — up to 10 images on rapid fire. With one pass through the frame, you can get several bites at the cherry.
Obviously, you will need something to support the camera, preferably something that packs down small and is lightweight. Carbon fiber is wonderful, but it is also very expensive. I have done much shooting with various aluminum Manfrotto travel tripods, some of them quite inexpensive, as well as tripods from MeFoto, Benbo, and flexible wrap-around Joby Gorilla tripods, and I’ve enjoyed success with all of them. Four feet of height is more than ample for most circumstances.
I carry my camera in my handlebar bag or pannier rather than in a backpack for the simple reason that if I should take a tumble, the camera will be safer. Ditto the tripod, only here the safety concerns are for me — I don’t care to hit the pavement with an aluminum bar across my spine!
Once you have arrived at a scene, you need to figure out where and how you want to place you and your bicycle in the frame. Don’t rush this! Set up your camera and tripod, look at the screen carefully, and see the image in your mind’s eye. Use your imagination. Decide precisely where you want you and your bicycle to be in that image. Think artistically. Take a note of where the shadows are falling and the angle of the sun and how it is illuminating the scene, or the streetlights for that matter. Be on the lookout for bits of litter or any jarring note that might spoil your picture. Is your tripod’s shadow going to mar an otherwise nice shot? Consider the sky. Is it interesting? If not, reframe and include less of it. Again, slow down. Compose your shot.
As you gain experience, composing and imagining yourself in the frame will become more intuitive, but here are a few hard-won tips.
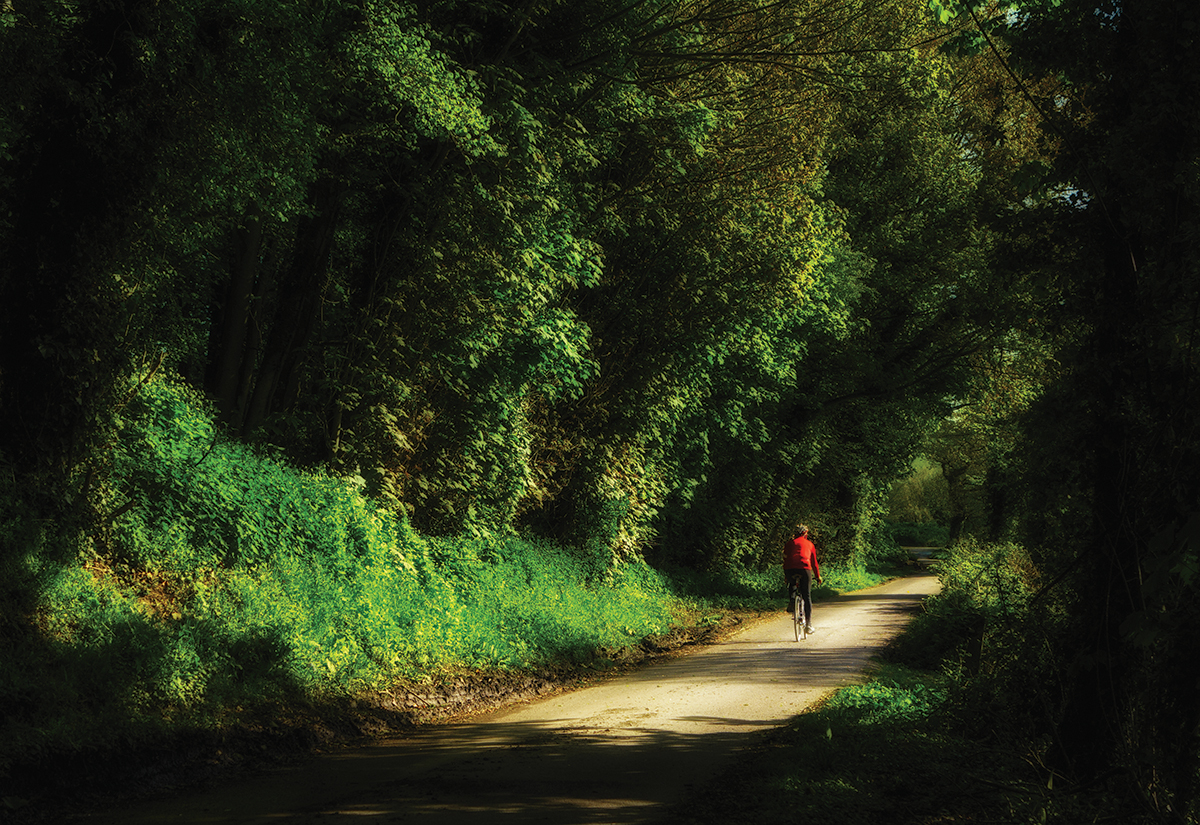
Cyclists rarely look good when shot from directly behind, at least not up close. Even Tour de France riders look porky from this angle, and as for the rest of us … well, it’s not a pretty sight. Instead, try pedaling through the scene at an oblique angle or head-on toward the camera. If you do want a from-behind shot, try to put a little more distance between your bottom and the camera lens.
Early morning and evening usually offer the best light for shooting. To add a bit of visual interest to your bicycle and create a nice effect, consider turning on your rear light.
Take note of precisely where on the road you want to be when the camera starts firing. Count the seconds in your head as you ride into the frame so you know when things are going to start happening and you can be in position. Pedal s-l-o-w-l-y when the camera is firing. If you are after a pin-sharp image, try a shutter speed of 1/250 second if you have enough light. If not, go as sedately as possible through the scene, keeping leg motion to a minimum. If you want a bit of blur, 1/8 to 1/13 second will do the trick. Pedal slowly — speeding up will not enhance the blur, you’ll just vanish completely.
Before you pack up and move on, review your images with a critical eye. Is there a lamppost sticking out of your head? Did you just miss that patch of sunlight? Or would the picture simply have been more aesthetically pleasing if you’d only been a little farther to the left or right? Be willing to do it over. It doesn’t take long and digital is free. The payoff in interesting and evocative images is worth it, and learning to ride with an artistic eye adds a whole new dimension to touring and really seeing a landscape.
Taking Your Camera Off The Beaten Path
By Claire Haughey
My one basic principal for taking your camera into the backcountry is this: develop your system! Safety, weatherproofing, and accessibility are all important considerations, but none of them will happen without a system you can stick to. When you’re wet and cold or a little bit lost, you inevitably cut out things not related to your basic needs. Without a good system, your camera will stay buried in your panniers until you come home and find it next to the hardened clementine peel from Day One of your trip.
The first thing I do is figure out how to keep my camera unpacked. If your camera is not readily accessible, you’re less likely to bring it out when the moment calls — or if you make the effort there’s a chance you will miss the moment entirely.
There are many bags (Mountain Hardwear, mountainhardwear.com) and camera clips (Peak Design, peakdesign.com) that allow you to wear your camera on your person rather than keeping it tucked away with the rest of your gear. My personal favorite is the Mountain Hardware Lure, a fanny pack that I wear on my front. Find the bag or clip that works for your body and is comfortable enough that you’ll actually use it.
If you’re serious about photography, it’s worth investing in weather-sealed camera bodies and lenses. While they do quite a bit of damage to your wallet, your equipment can remain accessible in spite of light rain or splashes off a wet road.
No matter your equipment, there comes a time when your camera simply needs to be put away and protected. I use a dry bag and pad it with my vampire outfit, the clothes I only bring out at night when I’m cozied up in my tent. The outfit consists of long underwear, a micro-down jacket, and wool socks. When I get completely caught out in horrible weather, I know I will always be warm and dry at night and so will my camera.
The key to a good system is remembering that when the weather calms down, a camera belongs on you — not packed away with your socks.
Claire Haughey (clairehaughey.com) is an outdoor photographer and graduate of the Rocky Mountain School of Photography.
This story originally appeared in the May 2017 issue of Adventure Cyclist magazine.